

Welcome to SELECT! This guide will walk you through everything you should do to make the most out of your free trial of SELECT. Let’s get started!
Before the Free Trial
Create Snowflake Service User
The one mandatory step before starting your free trial in SELECT is to create a new Snowflake service user with read only access to your Snowflake metadata. Once this is completed, you’ll be ready to connect your Snowflake account to SELECT once the trial begins.
While creating the new Snowflake service user is the only required pre-trial step, there are few other optional things you can do in advance to make the most out of your evaluation period.
Explore Relevant Integrations
SELECT helps attribute spend to the different tools in your data stack which connect to Snowflake. To get better visibility into your Snowflake spend, we recommend exploring our relevant integrations.
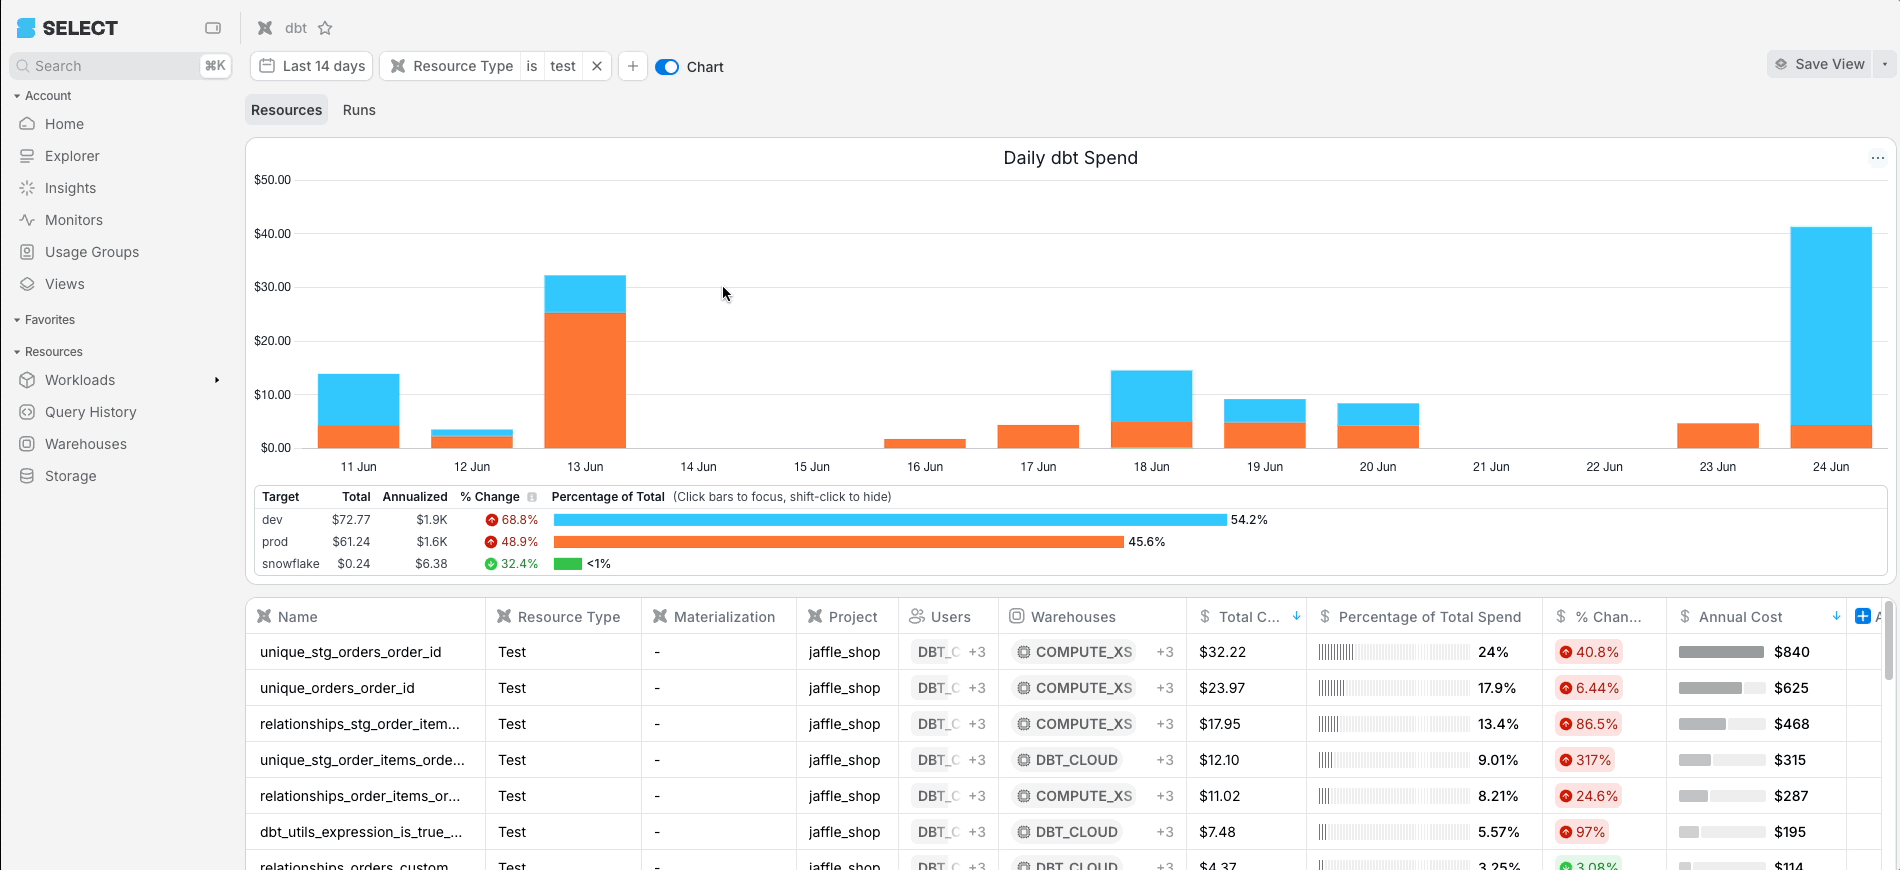
If you’re using dbt, we will require you to setup our open source dbt query tagging package. Instructions for the SELECT dbt integration can be found here. We recommend setting this up in advance of the free trial so that you have some historical data you can analyze once you connect your account.
If you’re using Looker, we require a new Looker service user to be created. Instructions for the SELECT Looker Integration can be found here. Other BI tools like Sigma, Hex and Periscope work out of the box based on the query comments automatically added by these tools.
Prepare Query Tags
For any tools or custom applications we don’t have an integration with, SELECT can analyze your Snowflake query tags using our Custom Workloads feature.
To take advantage of this feature, you’ll need to add a query tag or query comment to your queries run against Snowflake. Refer to our guide here on how to integrate with custom workloads. Similar to the dbt integration, we recommend setting this up in advance of the free trial so you have some historical data to analyze.
Apply Object Tags in Snowflake
Snowflake object tags are key-value pairs that can be applied to any Snowflake object. This allows you to categorize Warehouses, Users, Roles, etc., by department, team, cost center, business purpose and so on. We wrote a detailed article on how object tags work, how to create them, and how to observe existing tags in your account.
First, think through how you want to allocate spend to different teams. Is it by role? Database / schema? Once you have an idea of how to organize the budgets, implement the object tagging in Snowflake. Tagging objects is a powerful way to create Usage Groups in SELECT, which we’ll do later on.
During the Free Trial
Now that the trial prep is done, let’s get into how to make the most of your free trial. Here
Log into SELECT Application
Head to https://select.dev/signup and enter your details. You’ll be emailed an invitation to the product within 24 hours.
Connect Your Snowflake Account
After creating the new Snowflake service user for your account, you can connect it to SELECT by following the instructions listed here.
To access the add Snowflake account form, you can navigate to https://select.dev/app/add-snowflake-account or go to Settings → Snowflake → Add New.
When you successfully submit the form, it will take a few hours for the initial metadata sync. You will receive an email when the load is complete.
Invite Teammates to SELECT
During your free trial, you can invite any of your team members to SELECT. Our instructions for adding new team members can be found here.
Invited users access can be restricted using SELECT built-in RBAC. You can grant users access to specific Snowflake accounts, or the entire Snowflake organization. See our RBAC docs for more info. If you are interested in using Usage Groups to create RBAC, see our usage guide on that topic.
Enable Automated Savings
SELECT’s Automated Savings feature ensures your warehouses are fully utilized by adjusting warehouse configurations in real time. To enable Automated Savings, navigate to Warehouses page. You can use the check boxes to enable Automated Savings for multiple warehouses at once, or you can enable one Warehouse at a time using the toggle, as shown below.
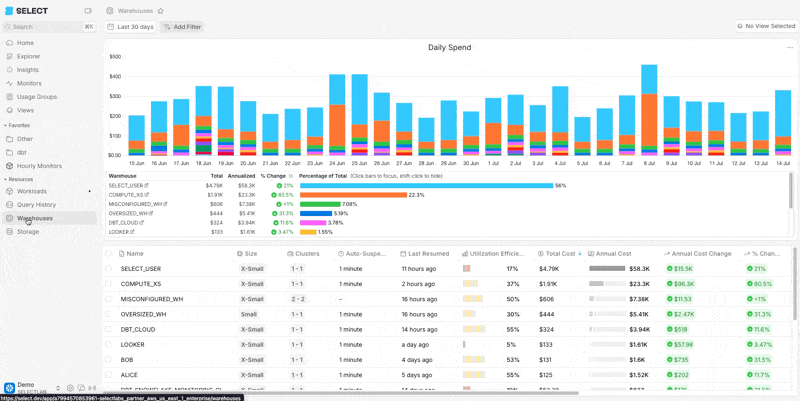
In the table on the Warehouses page you can see your Annual Savings and Annual Estimated Savings.

Also on the Warehouses page, you can set the bar chart metric to Estimated Savings or Savings to see a time series of those metrics.
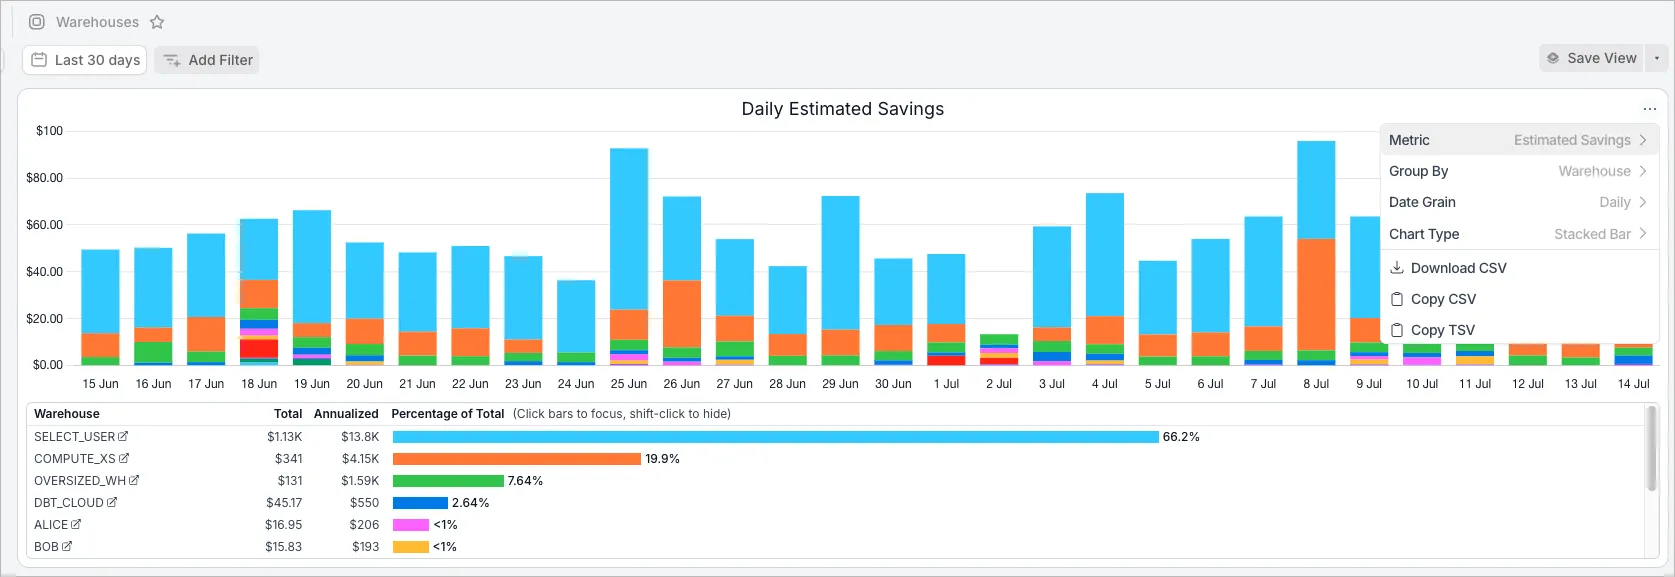
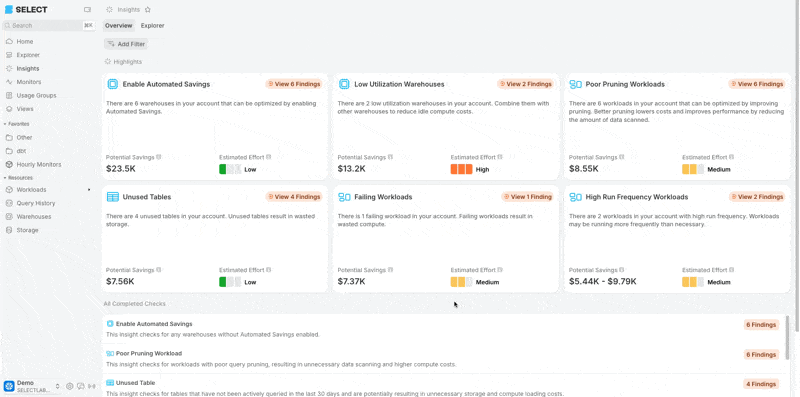
You can also see estimated savings for your account on the Insights page.
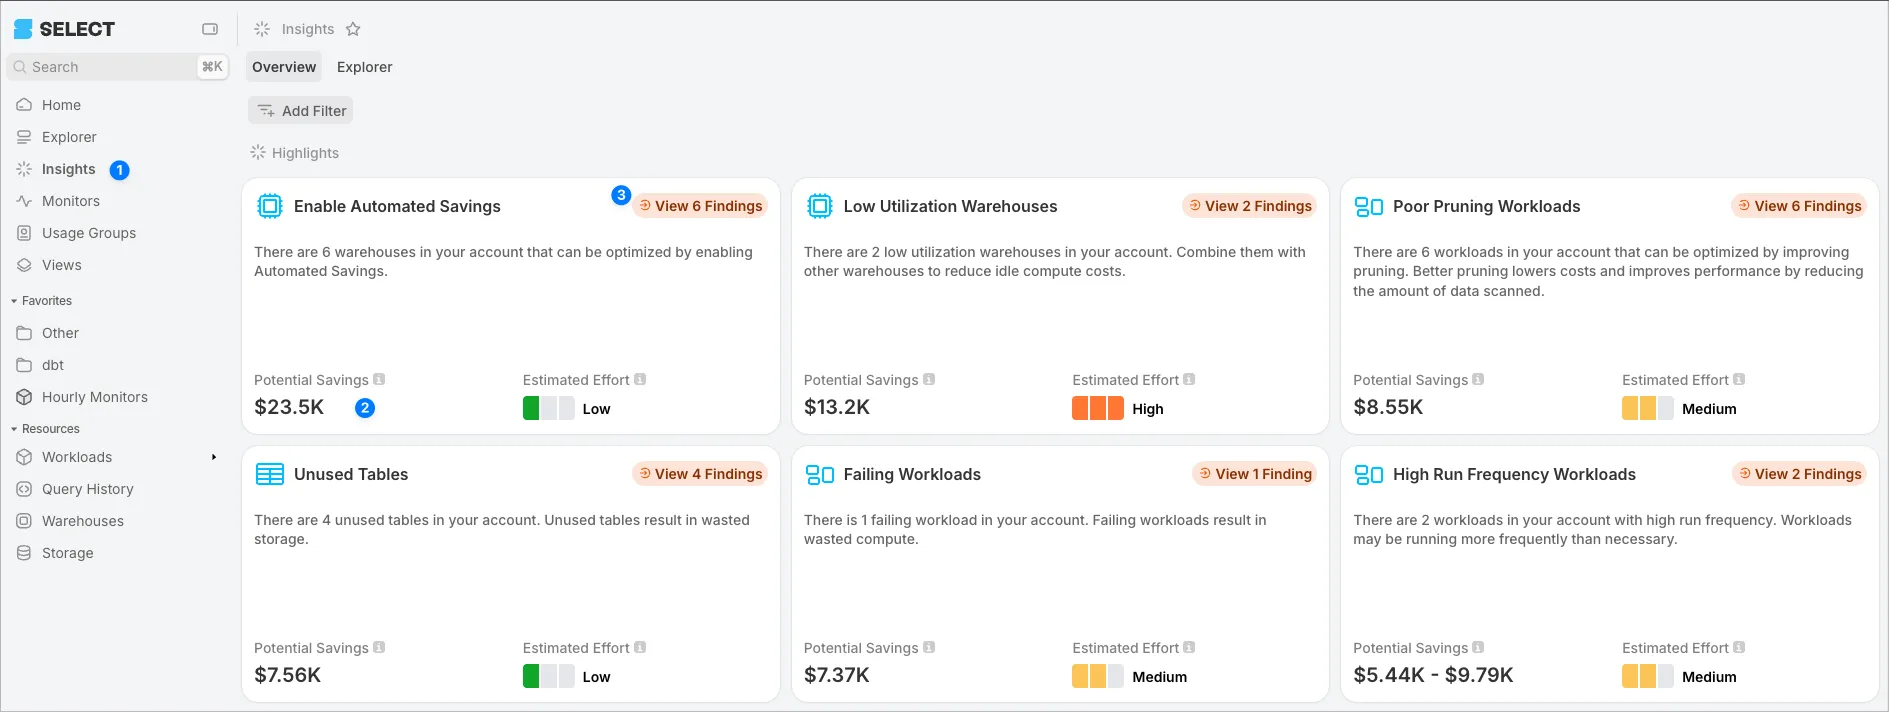
Click “View n Findings” to see the estimated savings by Warehouse.
Exploring Costs
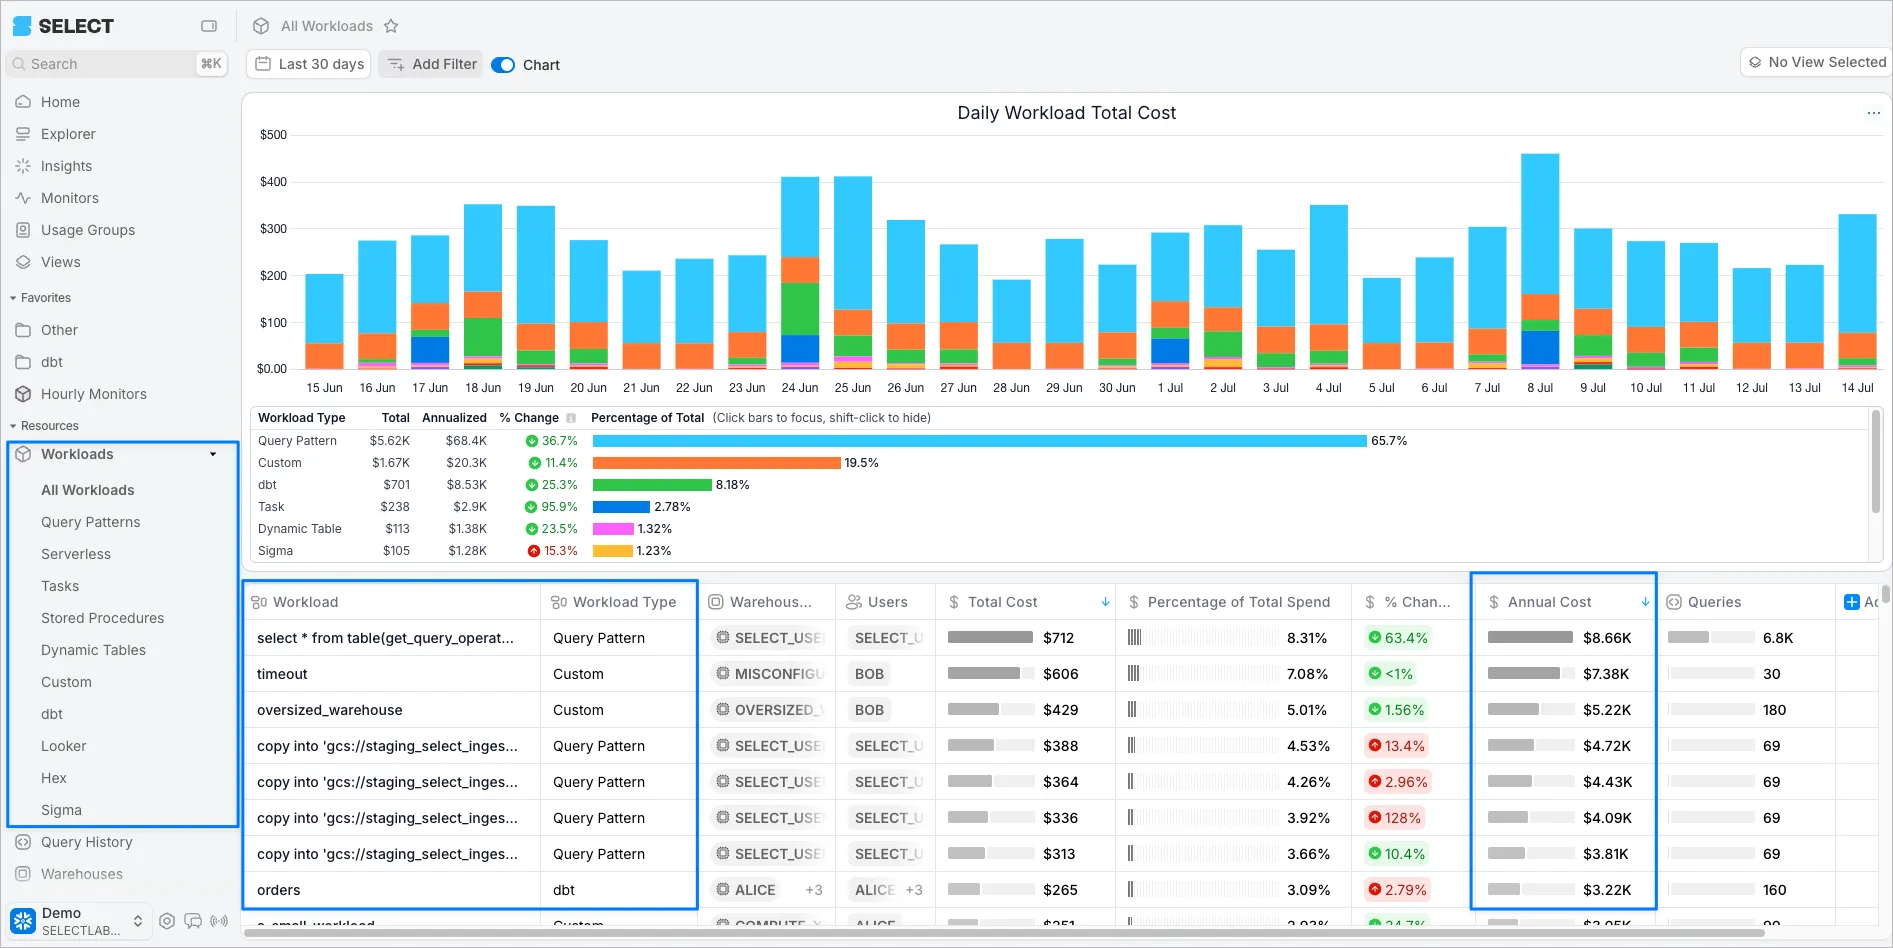
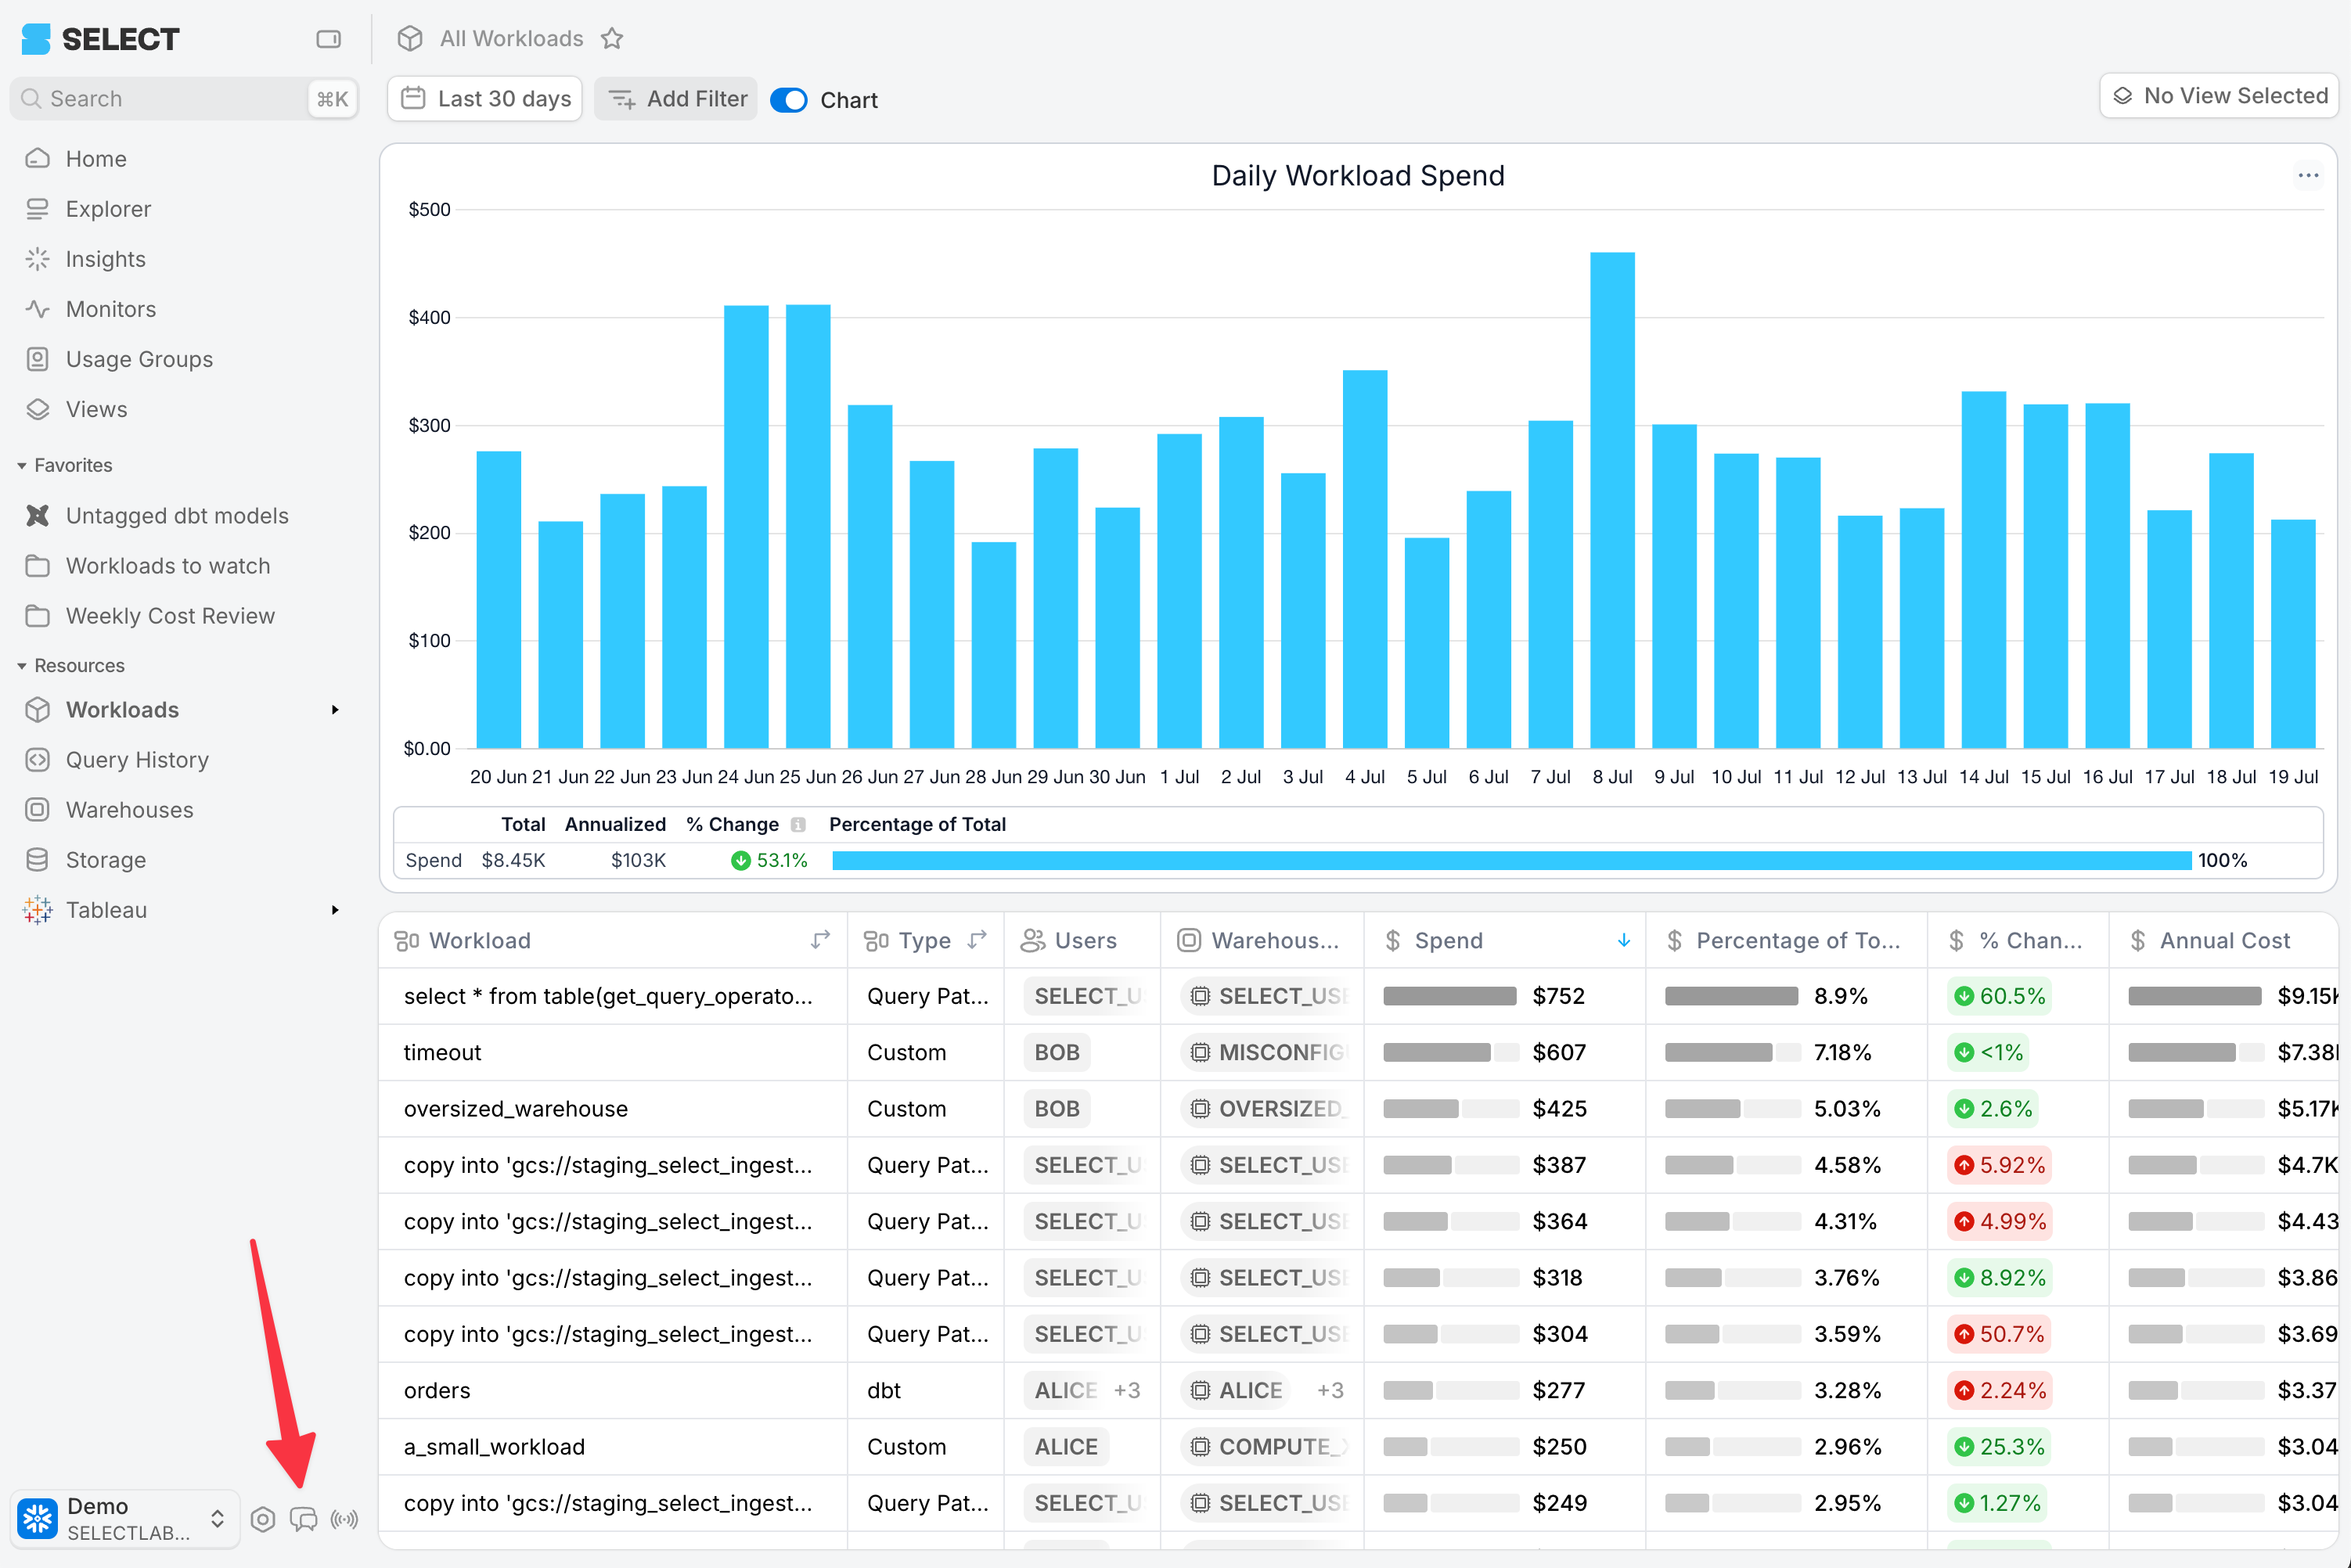
One way to explore cost in SELECT is from the Workloads pages. Decide if you’d like to explore All Workloads or a specific Workload category. The Workloads page will be sorted by highest annual cost. The default Workload (for uncategorized workloads) in SELECT is called Query Patterns. Query Patterns will group similar queries together so you can see the total annualized cost of running those similar queries. For more on Workloads, see our docs.
For more information, see our usage guide on exploring costs in SELECT.
Review Optimization Opportunities
The easiest way to find optimization opportunities in SELECT is from the Insights page. Here you’ll get an overview of the 6 insight categories with the ability to drill into each category by clicking the orange ‘View Findings’ button. Or, you can view all findings in the Explorer tab at the top.
To learn more about finding optimization opportunities, please refer to our usage guide.
Configure Usage Groups
Usage Groups are a flexible way of creating cost categories in SELECT. This feature allows you to allocate cost to teams or projects using a variety of Snowflake attributes such as User, Role, Tags, Database, or Workload, to name a few. For more on creating usage groups, see our docs or our usage guide (coming soon).
Configure Monitors
In SELECT, Monitors are a feature that allow you to monitor your Snowflake account spend by sending a digest at recurring intervals (we suggest weekly). You can also create alerts for spend anomalies or monitor your account for any condition using our custom SQL Monitors.
The alerts can be sent to a variety of destinations including Slack, MS Teams, or email.
You can monitor spend at the account level, or by Usage Group, Warehouse, or specific Workload.
For more on Monitors, see our docs and our best-practices guide (coming soon).
Create Saved Views and Favorites
Many screens in SELECT have filterable and configurable tables and charts. Instead of repeating the config and filters each time you visit the app, you can save the views.
Saved views can be favorited, which pins them to the left sidebar for easy access.
We suggest saving and favoriting views to support your weekly cost review ritual. Companies who review important views weekly are more likely to keep their Snowflake spend under control!
For more info, see our docs for Saved Views and Favorites or our usage guide.
Contact us at any point!
At any point during your free trial, you can reach out team via the in-app support by clicking the chat bubble at the bottom of the sidebar. Alternatively, reach us via email at [email protected].
You can also book a meeting with our team at any point by reaching out to [email protected].

