

The definitive guide to using Snowflake Tasks
Tomáš SobotíkMonday, November 20, 2023
Snowflake Tasks are a powerful feature, commonly used for data pipeline use cases or orchestrating administrative jobs (think backups, data quality checks) and alerts. In this definitive guide, I cover everything you need to about Snowflake Tasks, from task setup and creation, the different compute models, and task management and observability.
What are Snowflake Tasks
Snowflake Tasks let you run SQL on a schedule. The SQL command can be anything. A single SQL statement, or a call of a stored procedure which invokes multiple SQL statements. Tasks are a first class citizen in Snowflake, meaning they have an owner and you can control access to them by granting privileges, just like any other Snowflake object.
How to create a Snowflake Task
Similar to other Snowflake objects, Tasks can be created and managed programmatically with SQL. The most common parameters when creating a new task are:
schedule: when should task be triggeredwarehouse: what compute cluster should be usedcode: the SQL command to runcondition: a boolean expression that gets evaluated when the Task is triggered. It determines whether the Task will be executed or skipped if the condition is not met.
For a full list of parameters and settings associated with tasks, see the associated Snowflake documentation.
Task Creation Example
One of the key parameters you need to define when you create a Task is the schedule parameter. This dictates when the Task will be triggered. The schedule can be defined in several ways. You can specify it using CRON syntax, defining an interval in minutes (i.e. run every 5 minutes), or specify that the Task will run after another Task.
Let’s create a simple Task to refresh a dimensional model containing bike stations. We'll schedule this Task to run every night at 4 am:
This example uses the CRON syntax to schedule the Task. It might be a little tricky to read the CRON syntax if you are not used to it. I recommend using sites like crontab which can generate the right syntax for you along with an explanation.
Whenever you create a task, it will start out in a suspended state, meaning that it is not scheduled and you have to resume it first. You can do so with the following command:
Whenever you do any update to the Task definition (i.e. run an alter task command), it will become suspended and needs to be resumed! In my experience, this is often the root cause of issues related to data pipelines not running. When debugging Tasks, always verify if the Task is resumed. You can get the Task state from the output of the show tasks command.
Task Dependencies
Tasks can be chained together to create more complex data pipelines consisting of multiple tasks. Data practitioners often refer to this chain of dependencies as "DAGs" - Directed Acyclic Graphs, an example of which is shown below.
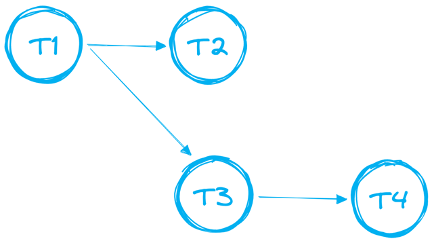
In the case of DAGs, there are certain rules and limitations which needs to be followed:
- DAG needs to have a single root task
- Only a single forward direction is supported. Your DAG cannot have loops.
- A single DAG can have up to 1000 Tasks in total
- A single Task can have up to 100 predecessors and up to 100 child tasks
Let’s add one more task into our pipeline and create a DAG. Our current task t_dim_station refreshes the dimension table from a raw table. We are going to add one predecessor task which will be populating the raw table from external stage. We'll also update its schedule. Instead of being scheduled to run at 4AM UTC, we will add an AFTER condition so the Task will be triggered once the predecessor Task successfully finishes.
First, we'll define the new predecessor Task t_raw_trips:
Now we have to modify our initial task. First we have to remove the SCHEDULE parameter and then add the AFTER condition.
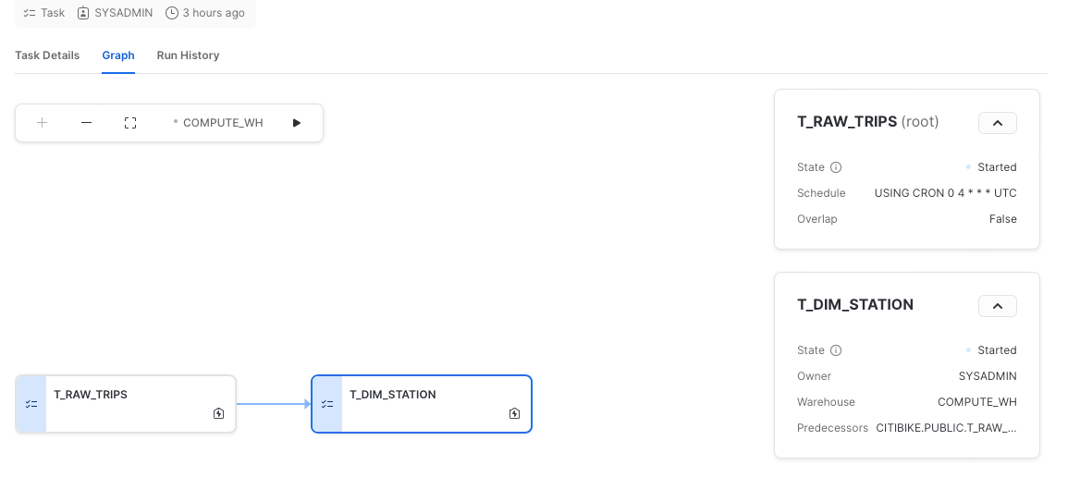
We have now successfully formed a DAG consisting of two Tasks where t_raw_trips is the "root task".
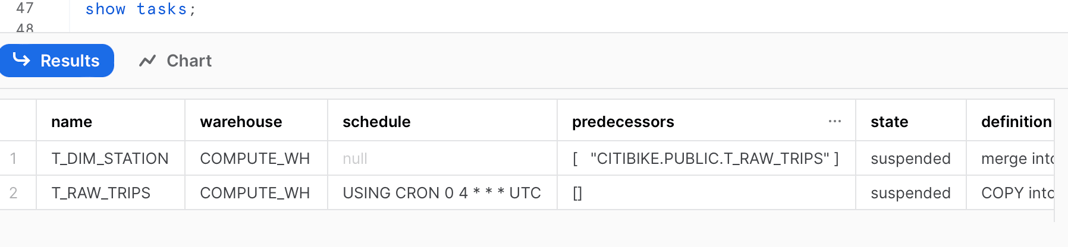
If we run the show task command again we can notice the following changes:
- The original task now has no schedule
- The original task now has a predecessor task
Snowflake also provides a great UI for working with tasks, especially DAGs. You can visualize the whole pipeline from the "Graph" tab, go into task details or see the run history.
Task Compute Models
Self managed warehouses
Both our example Tasks from above were configured to run on a self managed warehouse, COMPUTE_WH. This means the SQL commands run by the Tasks will execute on our own COMPUTE_WH, and we are responsible for managing that warehouse (choosing the right size, cluster count, auto-suspend, etc.).
An alternative approach is to the use Serverless Tasks.
Serverless Tasks
Rather than running on one of your own virtual warehouses, Serverless Tasks run on compute resources provided by Snowflake. To create a serverless Task, you just omit the warehouse parameter when creating a new task.
One advantage of Serverless Tasks is that Snowflake will automatically determine the optimal warehouse size that the Task should run on. There is a parameter named USER_TASK_MANAGED_INITIAL_WAREHOUSE_SIZE which defines what the initial warehouse size for the first Task run will be. After few runs, Snowflake ignores that parameter and assigns the warehouse based on insights from successfully completed runs. It learns over time what the best warehouse size for a given task and dynamically changes the size as required.
If you have an existing Task that runs on one of your own warehouses, you can convert it to a Serverless Task by running the ALTER TASK statement:
When to use Serverless Tasks versus a managed warehouse?
According to the Snowflake Credit Consumption Table, Serverless Tasks cost 1.5x more than Tasks running on your own managed warehouse.
With some math, we can find out that using the serverless compute option is better for Tasks that take less than 40 seconds to run. Otherwise, it will be more cost effective to use the managed warehouse option.
Serverless Tasks have the benefit of being able to automatically choose the right amount of compute resources for your Task, which could lead to cost & performance benefits if you choose a warehouse size that is too small for your Task.
Managing Tasks
When it comes to managing Snowflake Tasks, there are several things you'll want to understand:
- How often is the task running?
- How long does it take to run?
- How often is it failing?
- Can we trigger alerts when the Tasks fail?
Using the Snowflake UI
Let's explore how we can use the Snowflake UI to manage Tasks.
To locate your Tasks, navigate to the database and schema where you have created them.
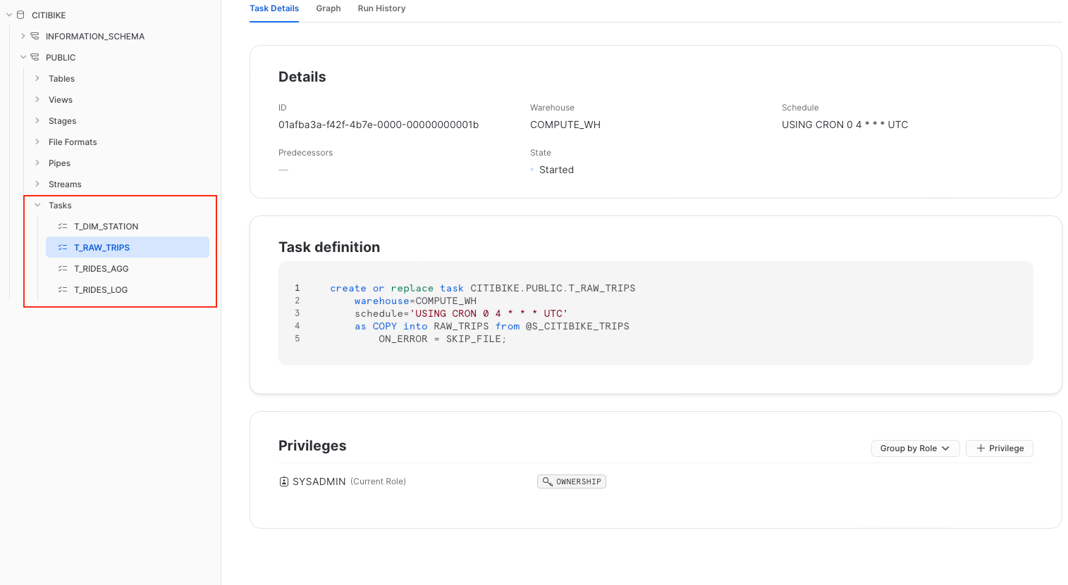
The Task "Details" tab gives you an overview of the whole task. You can see the definition together with key parameters like the assigned warehouse, schedule, and granted privileges. The "Graph" tab then gives you view on the overall DAG like we have seen above.
If you need to check the history runs, you can open the "Run History" tab.
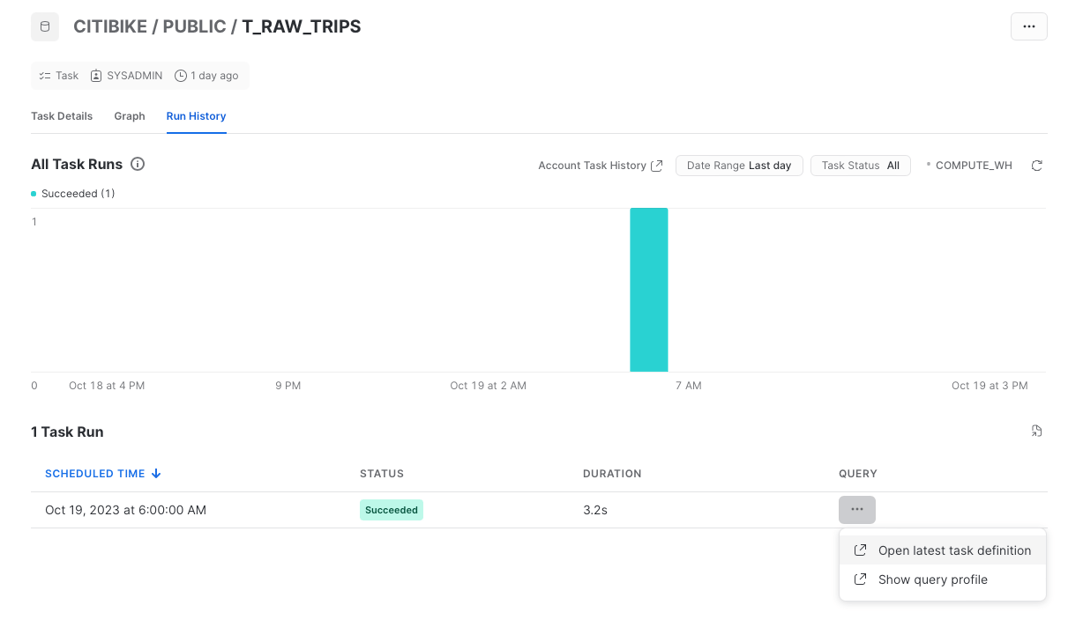
The Task history is visualized as bar chart showing the number of runs over time. Individual runs are shown in the table below. Note that this page will only contain runs data from the last 7 days.
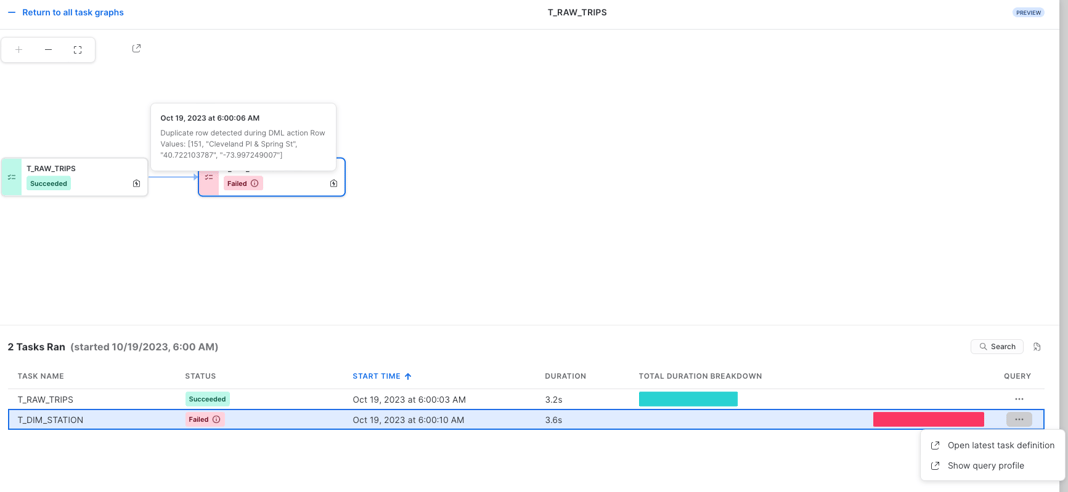
If you want to understand and monitor Tasks across your whole account, you can navigate to Activity -> Task History.
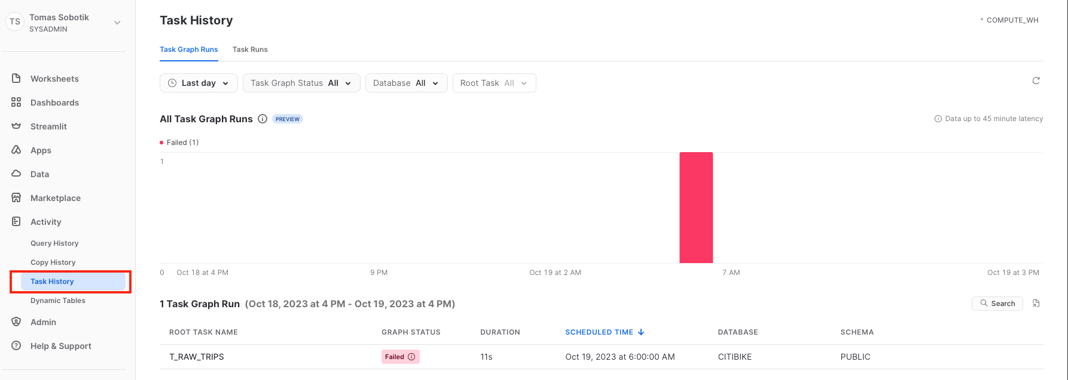
From here, you can open individual graph runs and check the status of each Task & run. This account level graph history UI is currently in Public Preview.
Programatically Monitoring Tasks
For folks who prefer code over Snowflake's UI, or would like to build their own visualization around Tasks, Snowflake offers a number of different views which provides you data about Tasks runs, statuses and more. Let’s go through a few examples.
We have already used the show tasks command which gives you a basic overview about the Tasks in your account. It provides information like Task state, definition, predecessors, warehouse and much more.

If you need to go through task history with SQL you can either use TASK_HISTORY() table function from the INFORMATION_SCHEMA or TASK_HISTORY view in ACCOUNT_USAGE inside the SNOWFLAKE database.
The table function returns task runs in the last 7 days and there is no latency which makes it a perfect source for custom monitoring of actual runs. On the other hand the view in ACCOUNT_USAGE has a latency up to 45 minutes and contains data up to 365 days back. That’s why it is better suited for historical analysis of Tasks runs, rather than exploring current runs.
Here's an example query using the Task history table function from the information schema to show all Tasks which failed in the given time range.

You can see that as part of the output you have information about the error together with query_id. If you want, you can go into Query History details or query profile to find out more about that failure. If you query that table function without any parameters will get all the task executions in last 7 days together with scheduled Tasks runs.

This approach works well when your Task triggers just a single SQL statement. But what if you have a Task which runs a stored procedure, which in turn triggers multiple statements? How can we go about identifying all associated statements?
To accomplish this, we need to leverage the SESSION_ID attribute in the QUERY_HISTORY view. All queries triggered by a stored procedure will most likely run within the same session. So what you need to do is first combine TASK_HISTORY() and QUERY_HISTORY to find out the SESSION_ID of the stored procedure call:

Then you can run another query to find all the queries with the same SESSION_ID.
Getting alerts for Task failures
Getting automatically notified when any Tasks fail is a critical requirement for most Task deployments.
Snowflake offers different features related to alerting and notifications, which can be used for Tasks. I have written separate blogs covering these options in more detail. You can check them out using the links below:
- A deep dive into Snowflake's alerting and notification features
- Error Notifications for Snowflake Tasks
Task Limitations
We previously discussed some of the limitations related to Tasks when discussing DAGs earlier in the post. Here's a summary of all limitations related to Tasks:
- Your Task can run a single SQL statement or stored procedure call
- A single task can have up to 100 predecessors
- A single task can have up to 100 child tasks
- A single DAG can have up to 1000 tasks
- A DAG needs to have single root task
- DAGs do not support loops
- Task can’t be shared through Snowflake's data sharing capabilities
How are Tasks billed
There are no extra charges or overhead fees for using Tasks. Users are only billed for the compute resources associated with executing the SQL statements associated with each Task. If your tasks run on your own managed warehouses, you will be billed for those compute resources in the same way you are charged for regular SQL queries running on a warehouse. If you are using Serverless Tasks, you are billed for compute resources managed by Snowflake. As a reminder, Serverless Tasks compute 1.5x more expensive than the equivalent compute costs from using your own virtual warehouses.
Monitoring Serverless Task Costs
Serverless Task costs can be monitored using the serverless_task_history view from the account_usage schema. Here's an example query:

Tomas is a longstanding Snowflake Data SuperHero and general Snowflake subject matter expert. His extensive experience in the data world spans over a decade, during which he has served as a Snowflake data engineer, architect, and admin on various projects across diverse industries and technologies. Tomas is a core community member, actively sharing his expertise and inspiring others. He's also an O'Reilly instructor, leading live online training sessions.
Want to hear about our latest data cloud learnings?Subscribe to get notified.
Get up and running in less than 15 minutes
Connect your Snowflake, Databricks, or BigQuery account and instantly understand your savings potential.

