Configure Destinations
SELECT supports sending Monitors to the following destinations:
- Slack
- Teams
- OpsGenie
Step 1: Connect a notification integration
To set up monitors, you first need to enable the notification integrations you want to use. Head to Settings -> Notifications in the SELECT web interface. From here, you can set up an email, Slack or Teams integration.
To enable our email integration, click the "Connect" button. You'll be prompted to enter an email address in the next step when adding a destination.
Teams
To connect Teams, click the "Connect" button. You'll be prompted to enter a webhook in the next step when adding a destination.
Slack
For Slack, you'll need to install SELECT's Slack application. Click the "Connect" button. You'll be prompted with a screen like this:
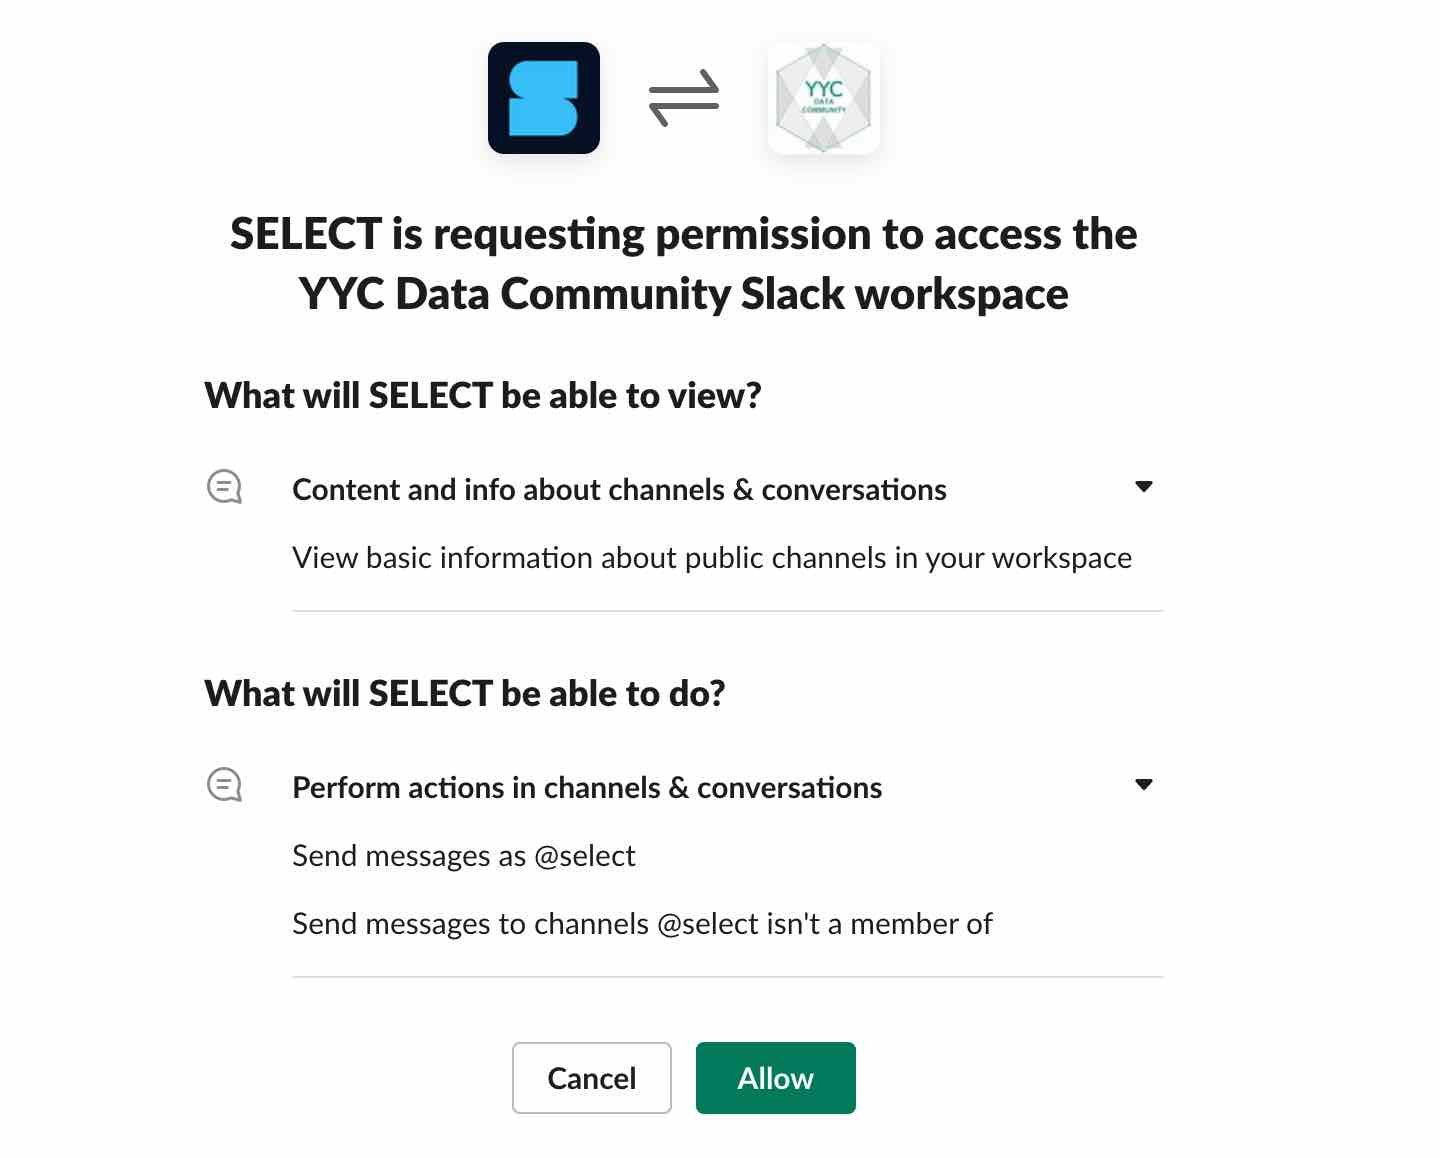
Our Slack app only requires access to list channels in your workspace and post messages. That's it! Once the installation is complete, you'll be directed back to this web page.
Step 2: Add a destination
After creating a notification integration, the next step is to add a particular destination where messages will get sent to. It can be an email address (for our Email integration) or a channel (for our Slack and Teams integrations). Click the "Add New" button.
For email destinations, you need only provide the recipient's email address. This can be your own or someone else's in your organization.
Third-party tools with email integration
You can also have your messages delivered to any third-party tool that provides email integrations, such as incident management platforms like Opsgenie or PagerDuty. See our Opsgenie documentation for an example.
OpsGenie
Monitors can be sent to OpsGenie by creating a dedicated email address in OpsGenie. Head to our OpsGenie instructions here for more details.
Teams
To create a Teams destination, first create a new Teams workflow by following the Teams Workflows documentation. During the process, you will be able to choose to which channel (or chat) the messages should be delivered to. Once that is complete, take note of your workflow URL and proceed with creating a new destination in SELECT:
Legacy Team Incoming Webhook support
We also support webhook URLs generated using the legacy Incoming Webhook feature from Teams, and we will support it for as long as Teams does. For new destinations, we suggest using the Workflows feature as described above.
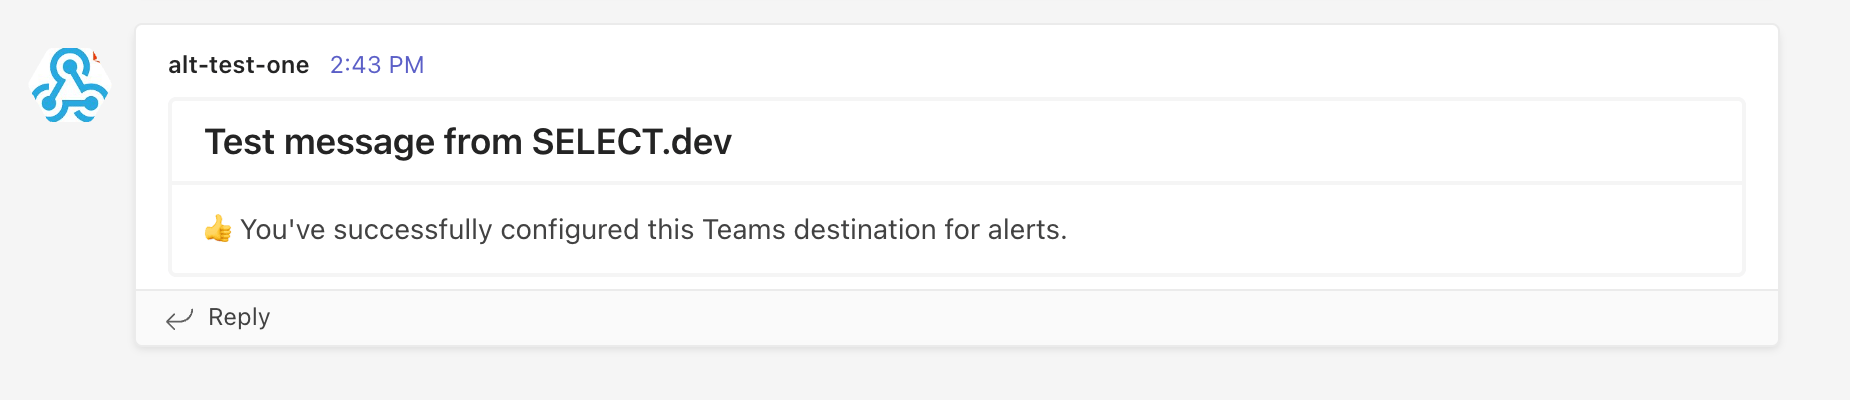
Whenever you add a new Teams destination or update a webhook, you’ll receive a test message like the one below (but with the name/image you chose) to make sure everything’s working.
Slack
For Slack, simply enter the name of the channel you want to connect.
Troubleshooting
Slack Private Channels
If the Slack channel you attempt to add in a destination is private, you may see an error like this.
In order to send alerts to a private Slack channel, the SELECT app must be added to the channel. You can do this by typing /invite in Slack, or by typing @SELECT in the channel and hitting enter. You'll then see a prompt to invite the app to the channel.
I’ve updated the channel in my Teams destination but are digests are still going to the old one
- Microsoft Teams webhooks are created for specific channels and are only authorised to send to that channel. The channel name is just to help remember where digests will go.
- If you’d like to change the channel a destination sends alerts to, you can create a webhook for the new channel and update your destination
- If you’d like to change the channel for one account without affecting other accounts, you create a new webhook for a new destination then set the account you wish to change to use that destination
I’ve set up a Teams destination but there aren’t any digests coming through
- Make sure the account for which you want to receive spend digests has a destination and at least one period set (as per the last screenshot)
- When you configure spend digests for the first time, you should receive your first one within 24 hours. Reach out to the SELECT team if you do not.