

Controlling Costs with Snowflake Resource Monitors
Ian WhitestoneSaturday, March 18, 2023
Resource monitors are a feature offered by Snowflake to help customers control their spend. In this post we cover everything you need to know about how to configure and best utilize resource monitors in your account. To start things off, let's cover why you should use resource monitors in the first place.
What are Snowflake resource monitors for?
Snowflake's usage-based pricing model and ease of scaling allow customers to pay for just the resources they need while quickly scaling to meet demand. The downside is that Snowflake costs can rise unexpectedly when left unchecked or without proper controls in place. Resource monitors help users monitor and control costs by sending notifications at defined spend thresholds. Resource monitors can also be configured to help avoid early contract renewal by mitigating unexpected credit usage.
What do Snowflake resource monitors do?
Resource monitors allow users to specify a Snowflake credit limit for a given resource and timeframe. For example, a warehouse or grouping of warehouses can be assigned a daily credit limit of 50 credits per day. When the specified percentage of that limit is reached in the given timeframe, resource monitors can trigger different actions. The three possible actions are:
- Notify the user via email
- Suspend the warehouse(s) after all queries are finished running
- Immediately suspend the warehouse(s) and abort any running queries
Outside of warehouses, resource monitors can be configured for an entire account.
The screenshot below shows an example of an email notification sent by a resource monitor.

How do you create a resource monitor in Snowflake?
Resources monitors can be created through the Snowflake UI or programmatically with SQL. Let's go through each approach.
Creating a resource monitor in the UI
To create a new resource monitor in the Snowflake UI, navigate to the Admin > Resource Monitors section. After clicking the "+ Resource Monitor" button in the top right, you'll be prompted to fill out the following details:
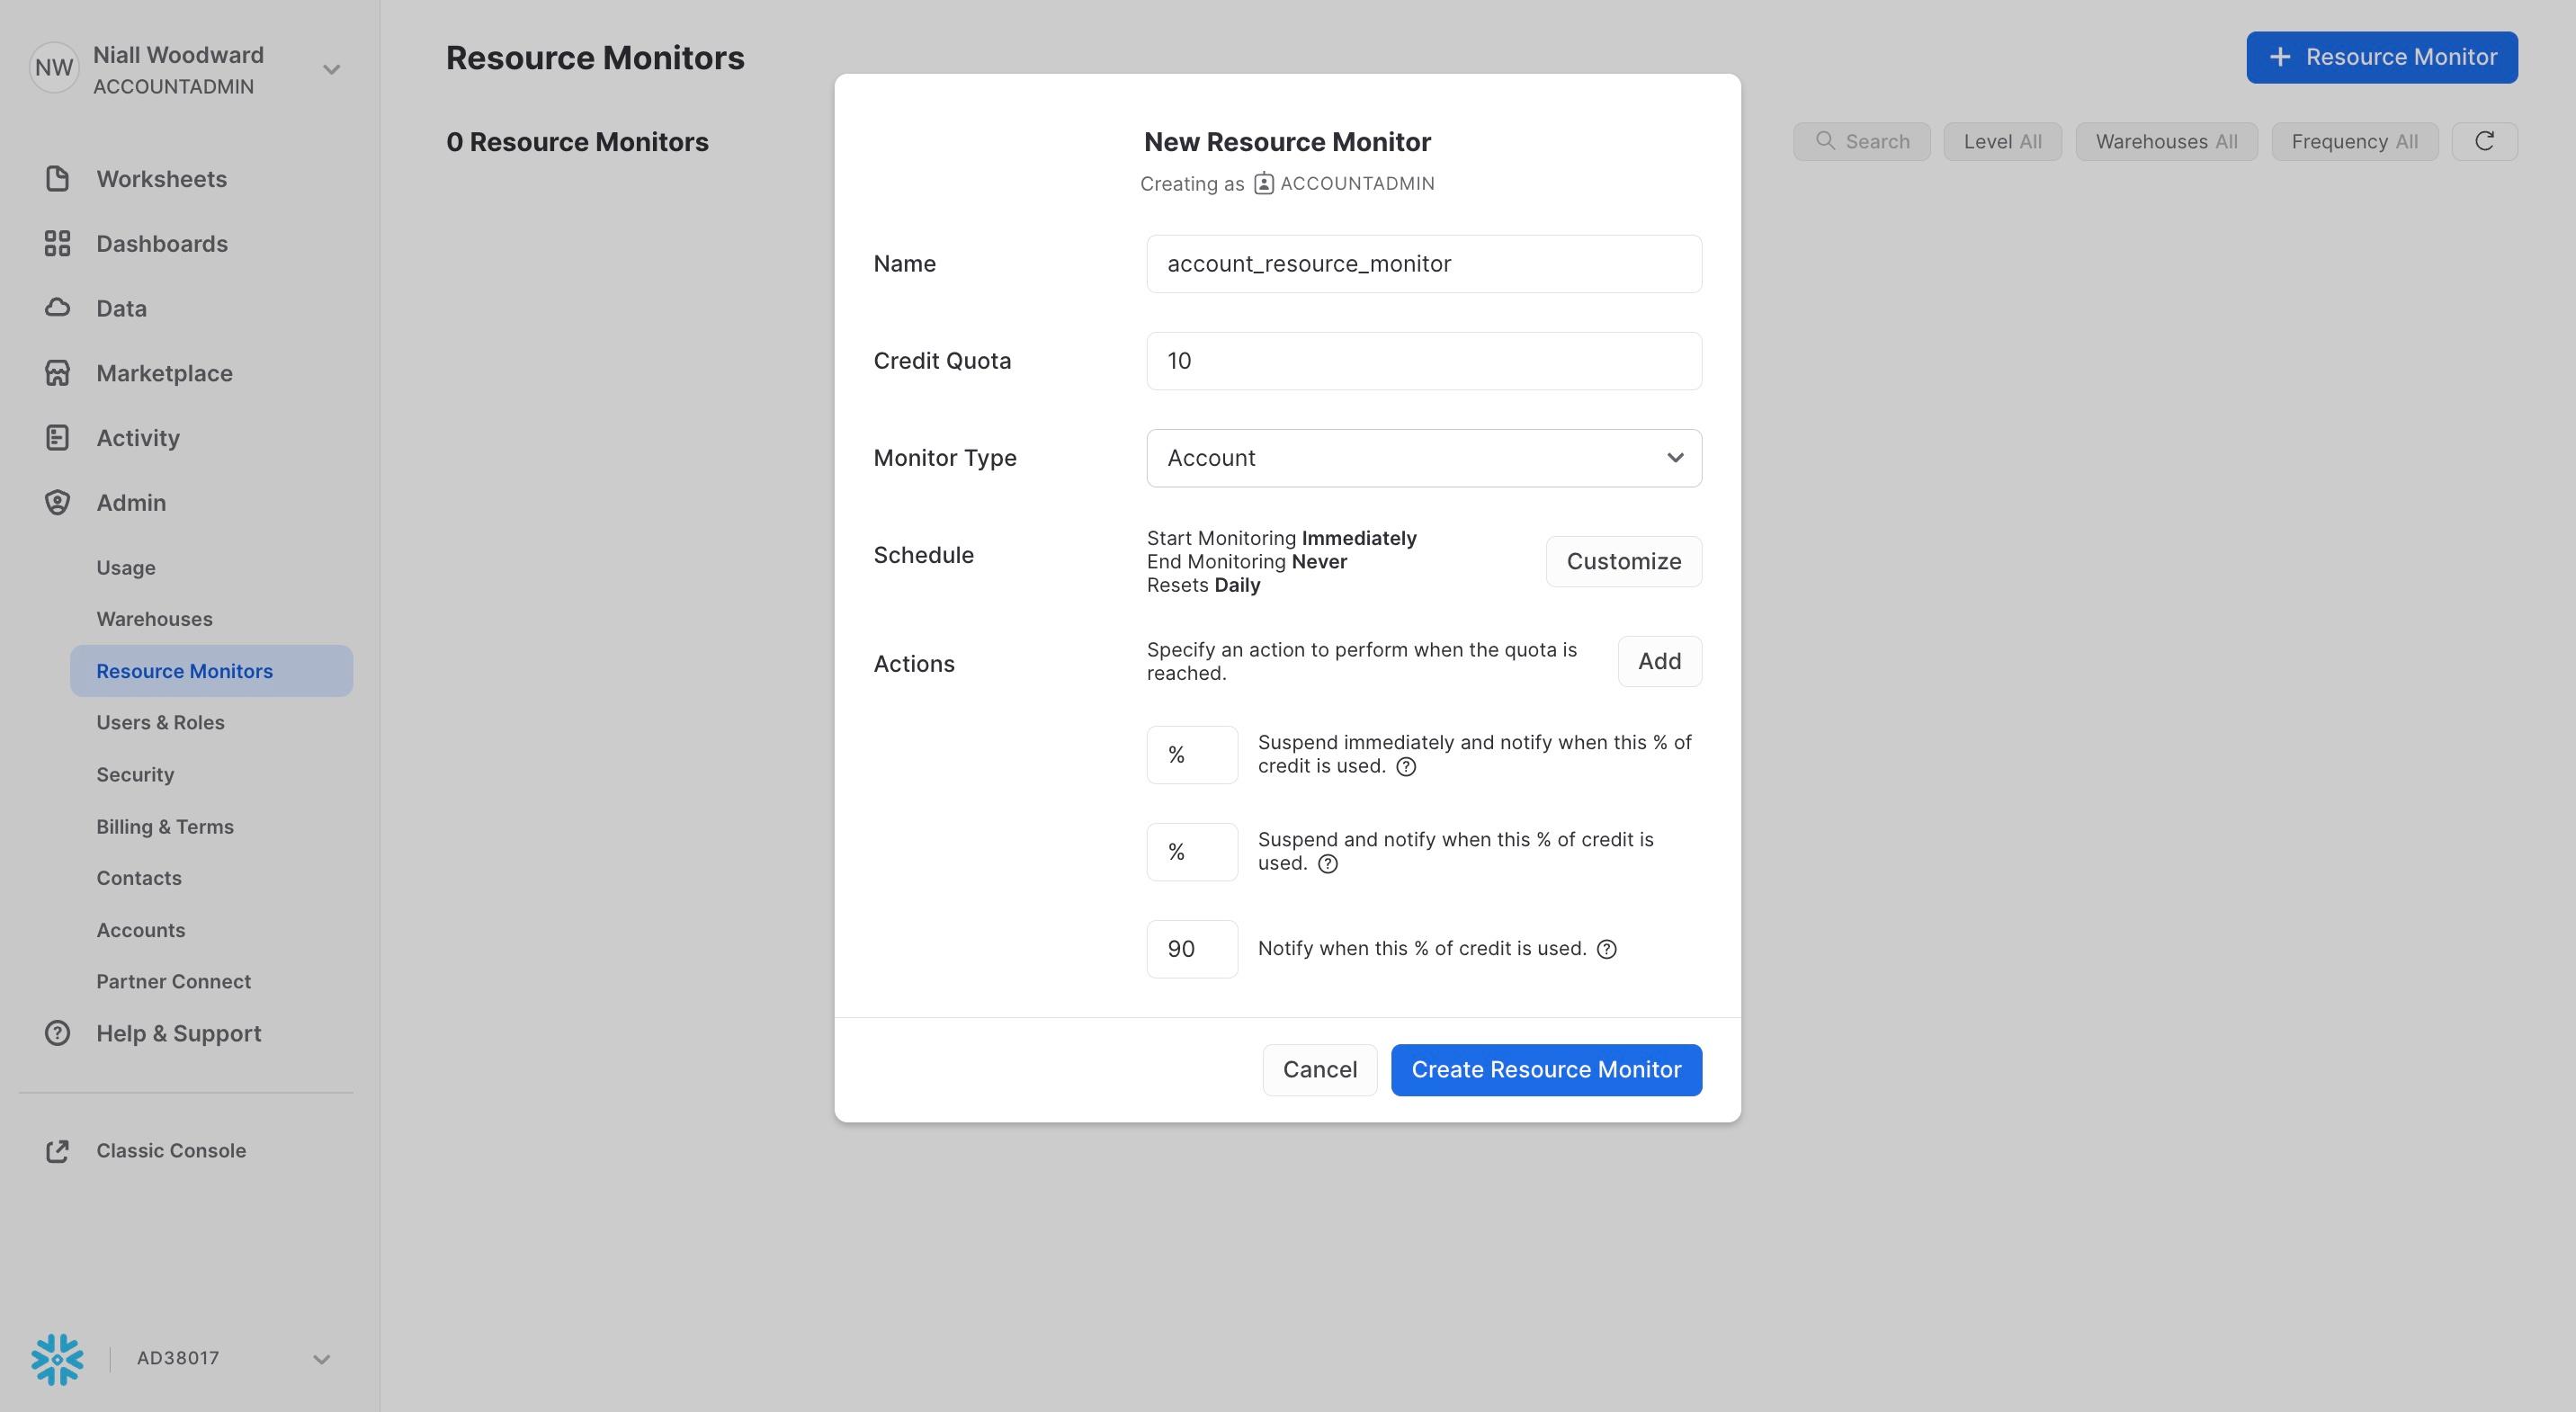
- Name: Set this to anything you like, but note that spaces are not allowed
- Credit Quota: The desired credit allowance for the monitor
- Monitor Type: Either "Account" or "Warehouse". If "Account", the credit quoata applies to the entire account. If "Warehouse", the quota only applies to the warehouses you specify.
- Warehouse(s): If you chose "Warehouse" as your monitor type, then you will be prompted to select 1 or more warehouses to associate with the monitor.
- Schedule: Here, the start time and (optional) end time for when the resource monitor operates can be configured. The frequency at which the resource monitor resets its credit count can also be set. Supported options for this include: daily, monthly, yearly and never.
- Actions: At least one action must be configured to create the monitor.
Creating a resource monitor with SQL
An example command to create a resource monitor with SQL is shown below:
To assign the monitor to the COMPUTE warehouse, run the following:
alter warehouse compute set resource_monitor = compute_warehouse_monitor
The full syntax for this command can be found in the Snowflake documentation.
What resource monitors should you consider creating?
Consider creating an account-level resource monitor based on your Snowflake contract amount. This can help ensure you don't finish your contract budget earlier than expected.
For example, if the remaining Snowflake contract balance is $240,000 over the next 6 months, then you could set a monthly account resource monitor with a credit quota of 16,000 credits (assuming a credit price of $2.5/credit). You could choose to get notified by email if the account's credit usage exceeds 100% of that quota.
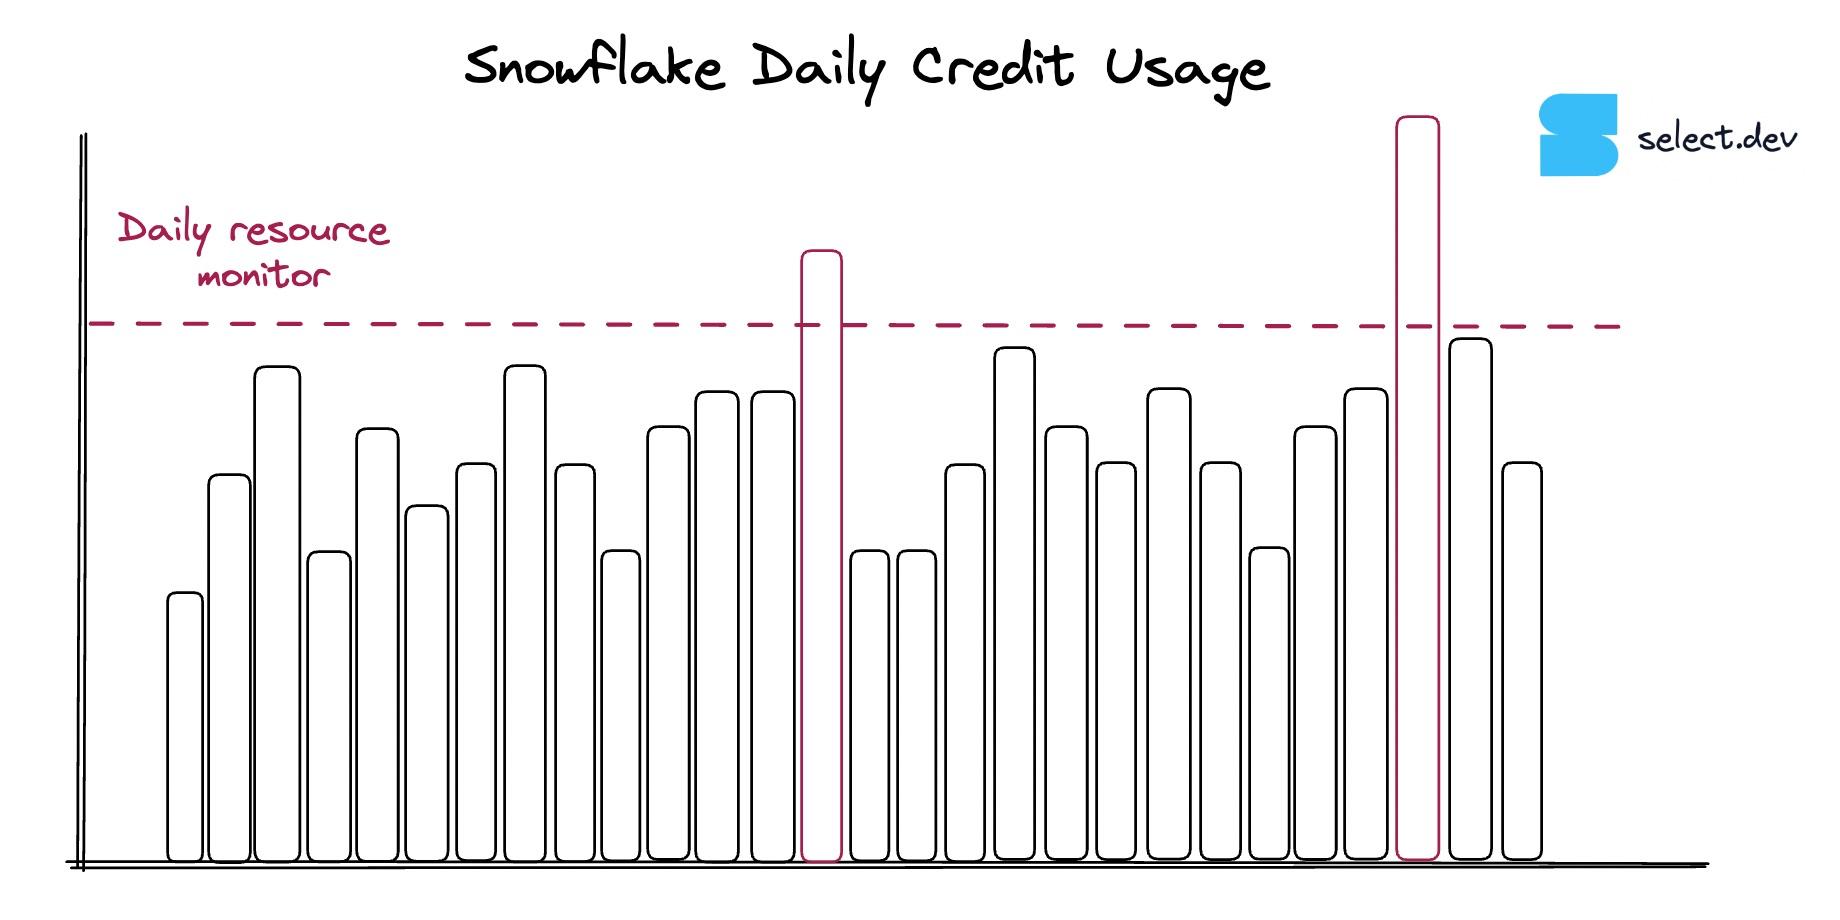
Another recommendation is to create a resource monitor to alert you of any credit usage spikes. To accomplish this, you could create a resource monitor to send an alert whenever daily spend exceeds 1.5x the average daily amount. We recommend adjusting this threshold multiple as needed to avoid being alerted too frequently.
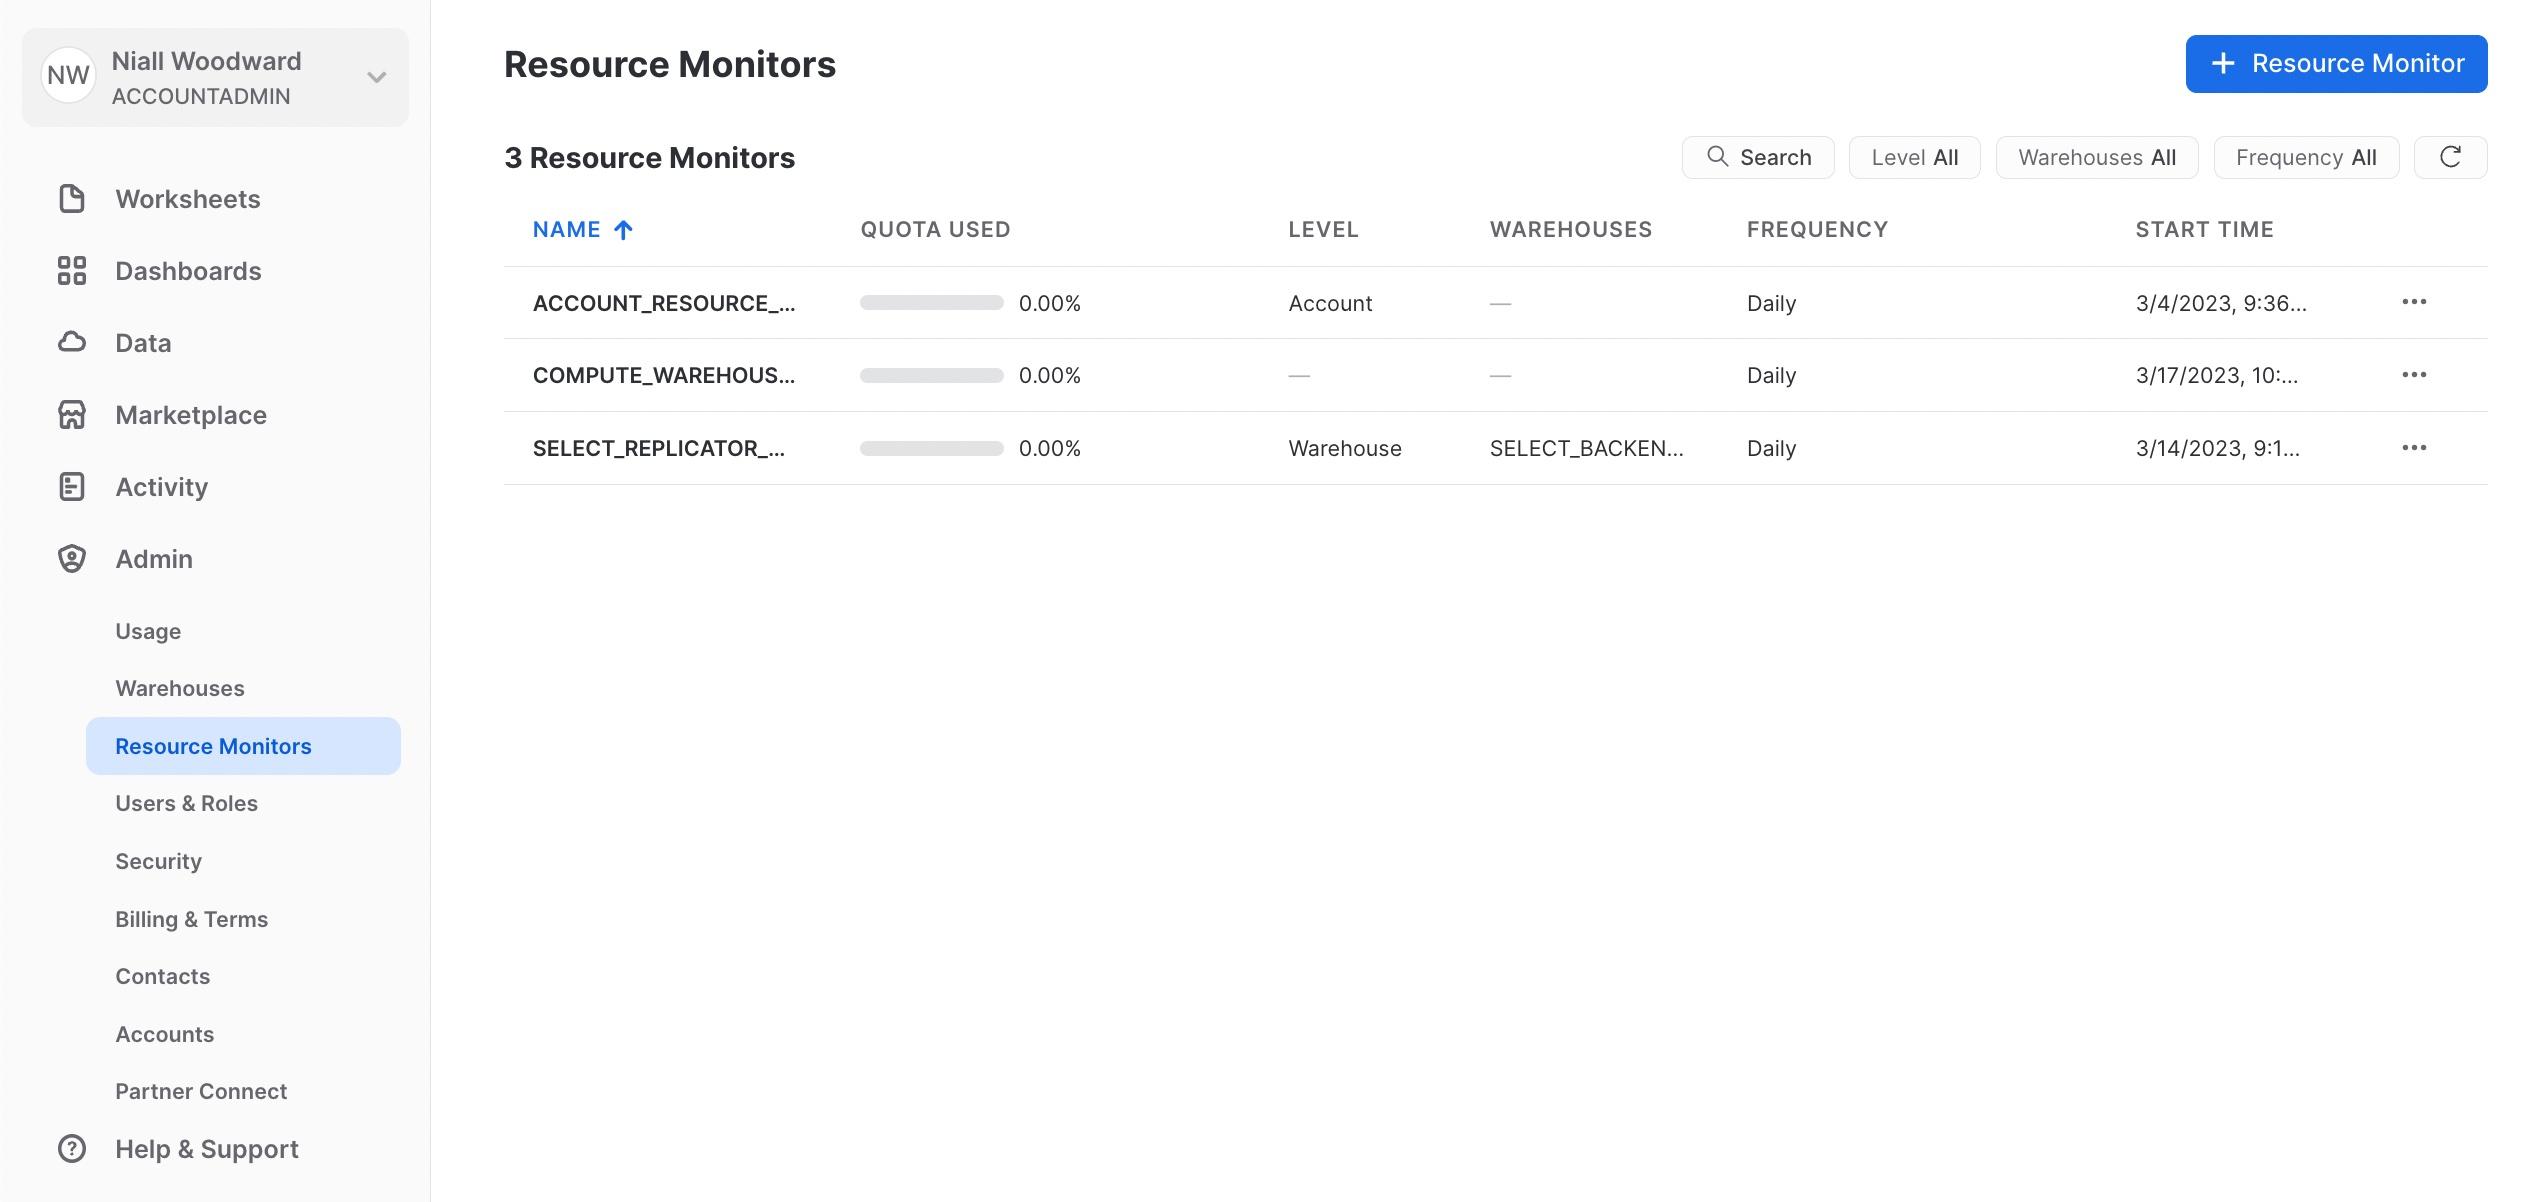
How do you view resource monitors?
Resource monitors can be viewed in the Snowflake UI under Admin -> Resource Monitors:
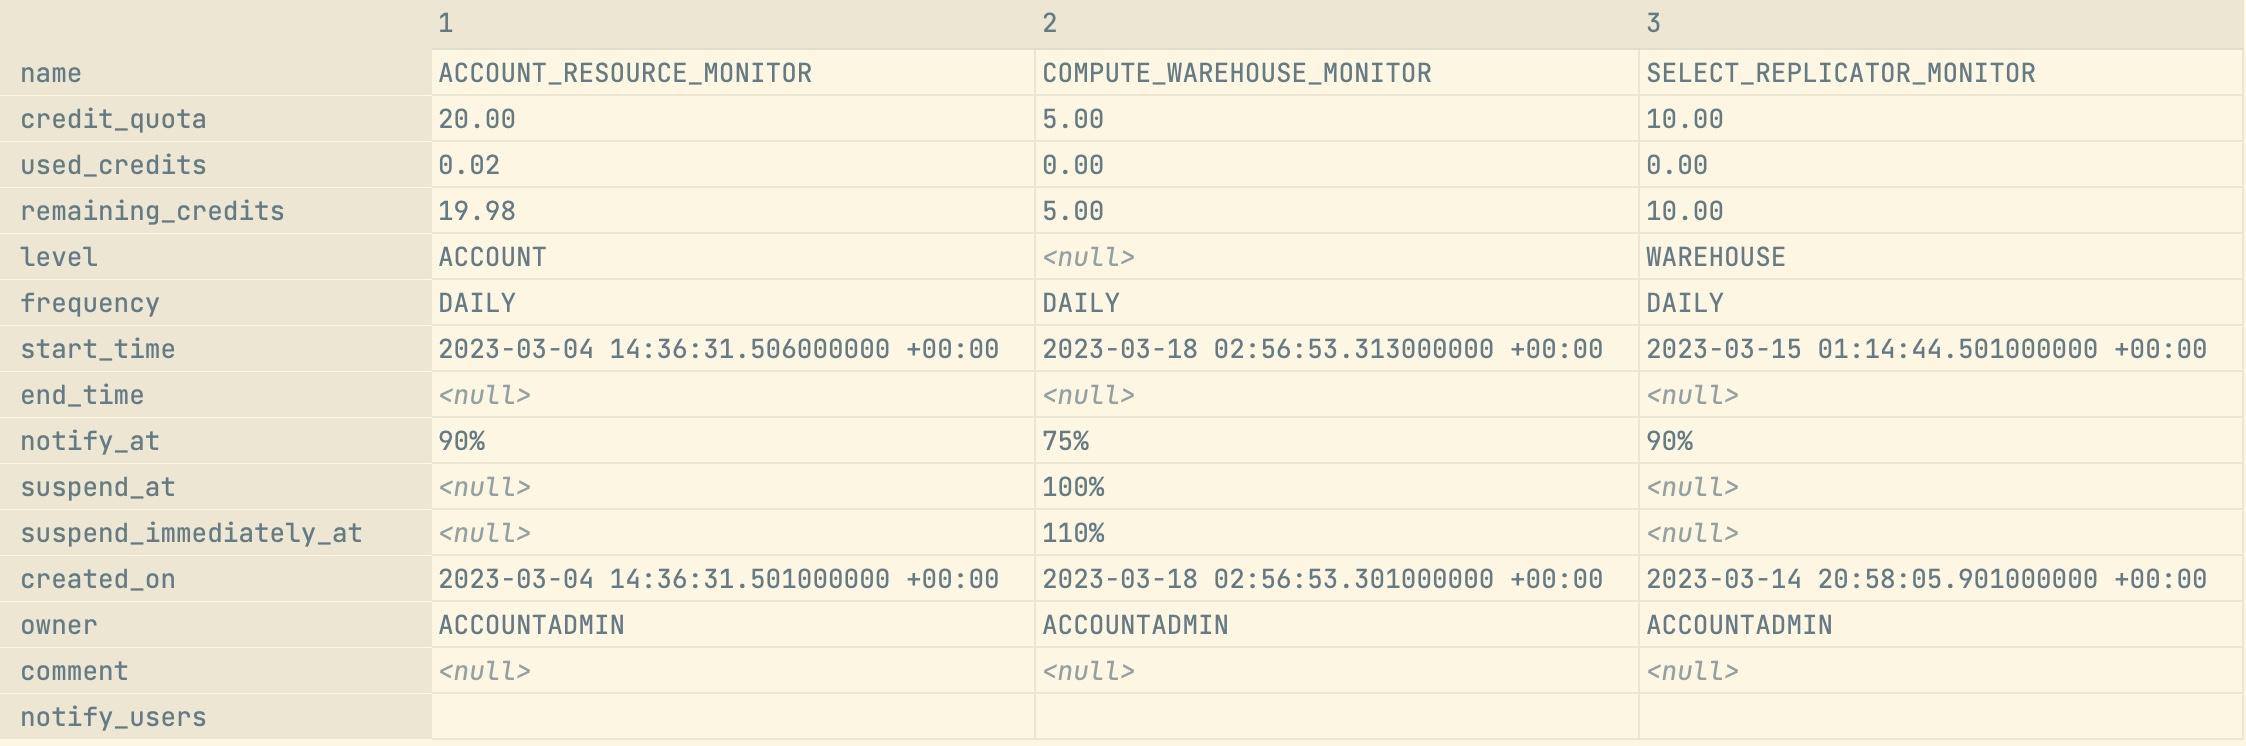
Alternatively, you can run show resource monitors as a SQL statement:
Who can create or access resource monitors?
Resource monitors can only be created by account administrators. Once a resource monitor is created, roles can be granted access to view or modify a monitor. Access has to be granted to each resource monitor individually.
Any user in Snowflake can receive email notifications from resource monitors. This is accomplished using SQL by setting the NOTIFY USERS parameter on the resource monitor. See the Snowflake documentation for more details.
What are the downsides of Snowflake resource monitors?
While resource monitors are a great starting point for controlling Snowflake credit usage and avoiding unexpected charges, there are a few downsides as of today.
First, you can only set resource monitors at the account or warehouse level. Serverless features such as automatic clustering or materialized views can also incur sudden charges but are not supported by resource monitors.
Resource monitors only support notifications via email. Most teams prefer to receive notifications directly in Slack or Teams along with the rest of their alerts and team communication.
Additionally, as shown in the screenshot earlier, the email notifications contain little information about what caused the credit allowance to be exceeded. Users must then dig through their account usage data to determine what caused the spike.
If you'd like a richer experience, we recommend using SELECT which offers these more advanced features out of the box with minimal set-up effort.
Troubleshooting no email from resource monitor
If you are not receiving an email from a resource monitor, it may be because notifications haven't been enabled for the Snowflake admin. See this page for instructions on how to accomplish that.

Ian is the Co-founder & CEO of SELECT, a SaaS Snowflake cost management and optimization platform. Prior to starting SELECT, Ian spent 6 years leading full stack data science & engineering teams at Shopify and Capital One. At Shopify, Ian led the efforts to optimize their data warehouse and increase cost observability.
Want to hear about our latest data cloud learnings?Subscribe to get notified.
Get up and running in less than 15 minutes
Connect your Snowflake, Databricks, or BigQuery account and instantly understand your savings potential.

