

Prerequisites
- You need Account Admin privileges and Metastore Admin privileges for your Databricks workspace
- A Unity Catalog-enabled workspace
Connecting the workspace
Manual Setup
Step 1: Get account and workspace identifiers
- Head to the Databricks console
- Note down your Databricks Account ID from the menu on the top right profile icon
- Click Workspaces, select a Unity Catalog-enabled workspace
- Note down your Workspace URL
Step 2: Create a service principal
- In the workspace, select Settings from the top right Profile icon
- Under Workspace admin, select Identity and access
- Next to Service Principals, click Manage
- Click Add service principal
- An Add new service principal modal pops up, click Add new
- Give the service principal a memorable name (e.g.
select-service-principal)
- Open the newly created service principal, select Secrets tab, then click Generate secret
- Enter lifetime of 730 days, then click Generate
- you will need to create a new secret and update it in SELECT when it expires
- Note down your Secret and Client ID
Step 3: Create a Serverless SQL Warehouse
- Navigate to SQL→SQL Warehouse from the navigation menu
- Click Create SQL warehouse with the following config
- Name: pick a memorable name (e.g.
select-sql-warehouse) - Cluster size: 2X-Small
- Type: Serverless
- Auto-stop: set to 5 minutes to minimize idle costs (can be reduced to 1 minute via the Databricks Warehouses API after creation — the UI minimum is 5 minutes)
- Name: pick a memorable name (e.g.
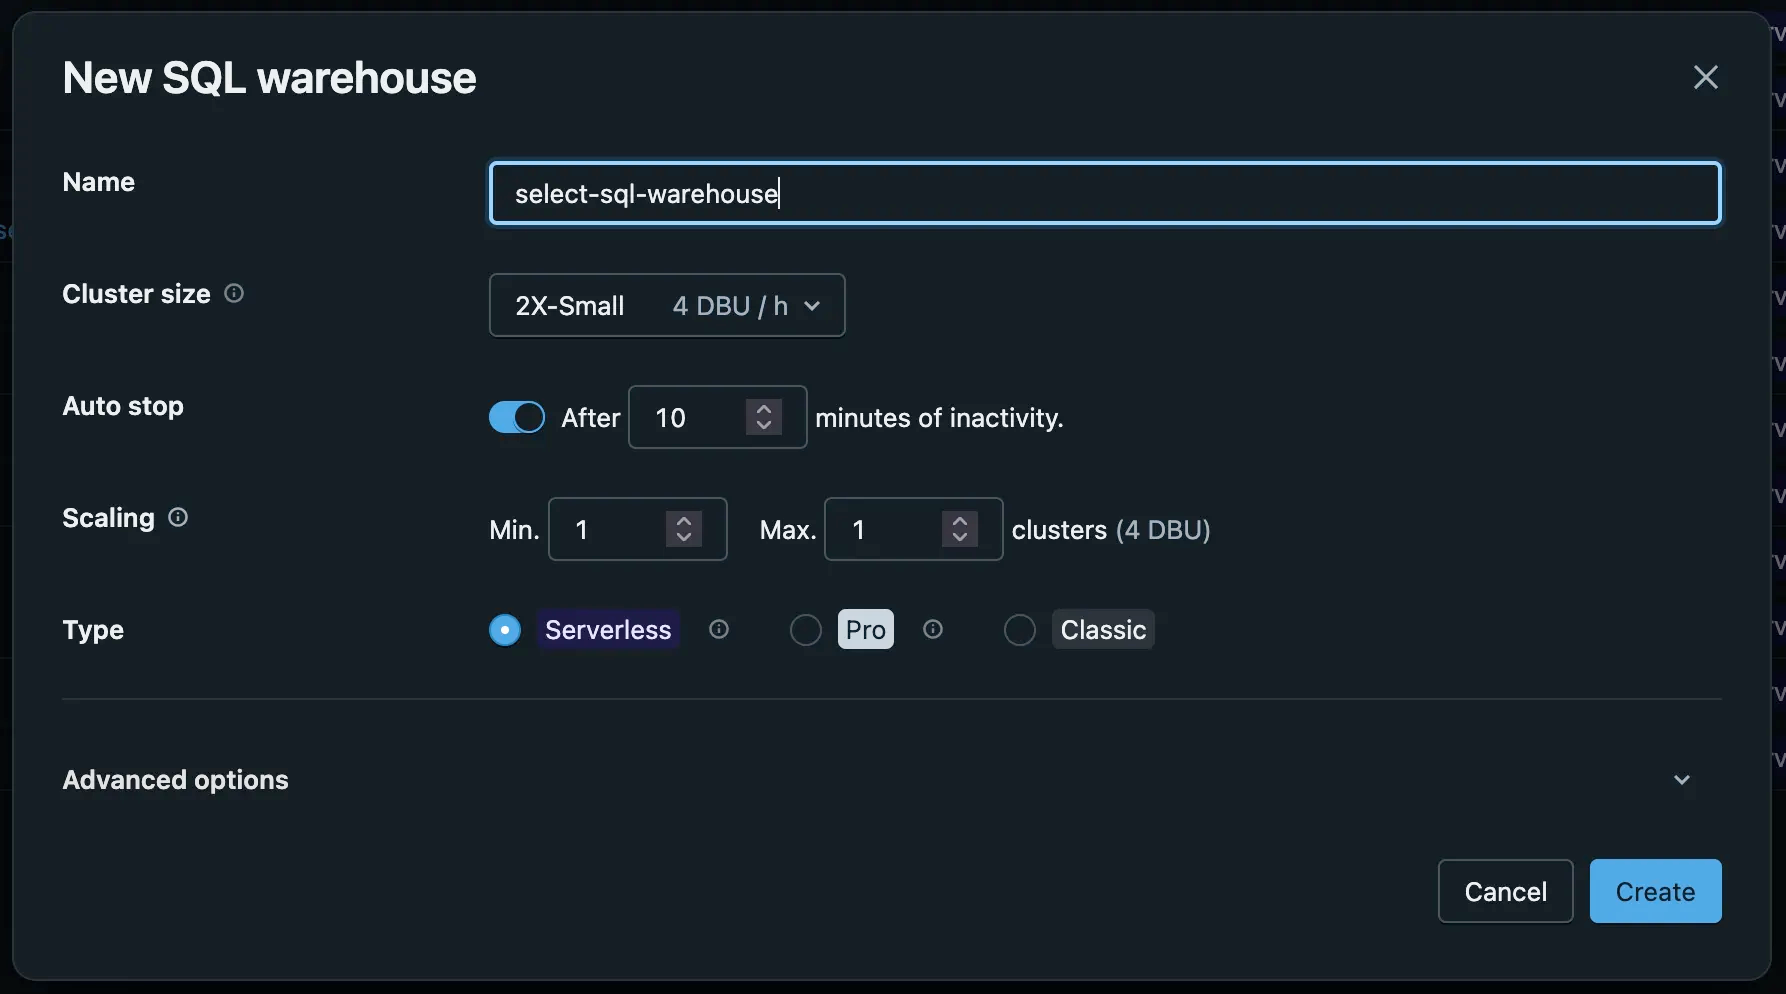
- Click Create
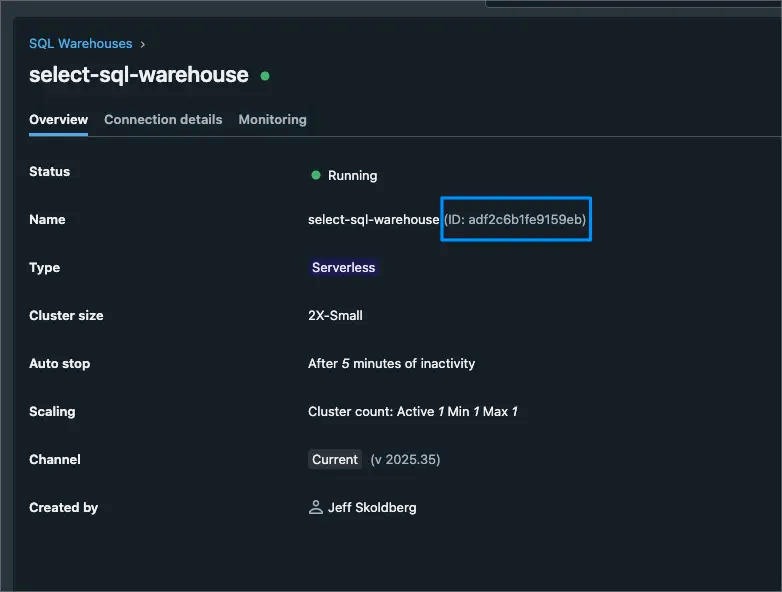
- After the warehouse is created, the Manage permissions modal window is shown
- You can also access this modal by clicking Permissions
- Search for and select the service principal you created (using the name or client id).
- Select Can Use permission, click Add and close the modal
- Note down the Warehouse ID
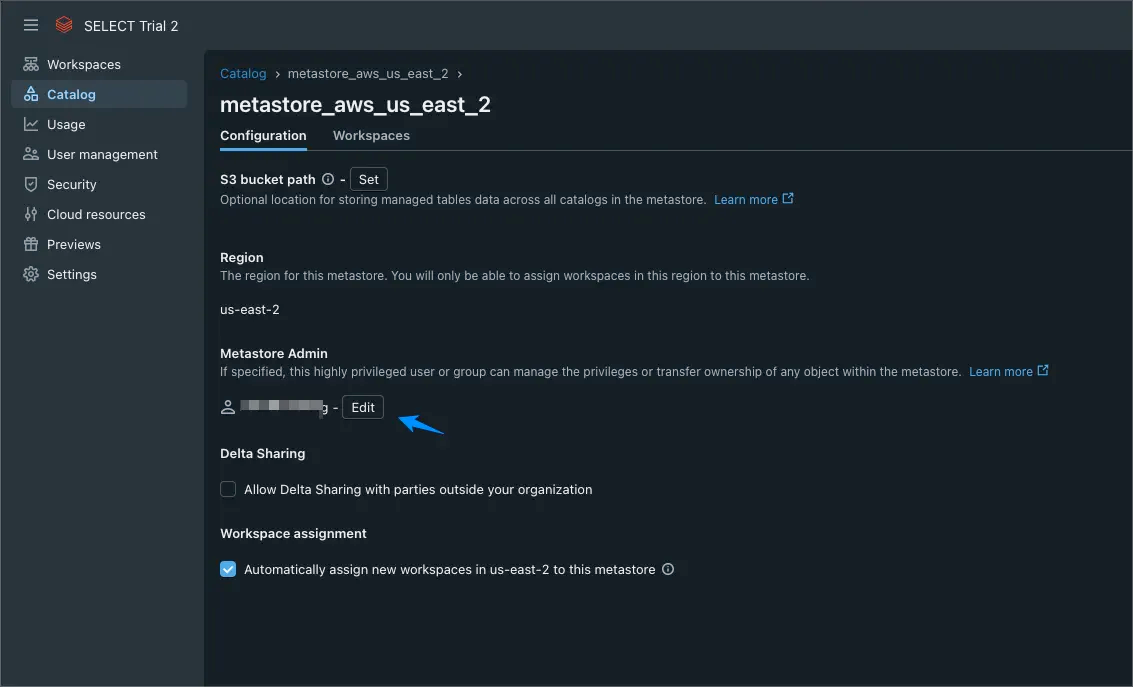
Step 4: Grant Read Access to system catalog tables
Grant the service principal the exact privileges SELECT needs:
USE CATALOGon thesystemcatalogUSE SCHEMAon each schema we read fromSELECTon each table we read from
Open a SQL editor in your Databricks workspace (attached to the warehouse created in Step 3), find/replace <service-principal-client-id> with the **Client ID** noted in Step 2, then run:
Step 5: Allow SELECT IP Addresses
If your Databricks workspace has configured a network policy to restrict access based on IP address, you'll need to update the network policy to allow SELECT to connect. Refer to the following documentation for more information:
The following python code can be run in a notebook if you would like to configure this at a workspace level:
Step 6: Enabling Automated Savings
Automated Savings for Jobs Compute is currently in development. In the meantime, you can set up the required permissions now so you're ready when it launches.
The Automated Savings feature for All-Purpose Compute, Jobs Compute and SQL Warehouses requires granting the CAN_MANAGE permission to the SELECT Service Principal on each of the relevant resources. For Jobs Compute, the permissions should be granted on the Job itself rather than the compute resources which it creates.
Repeat this for all Clusters, Warehouses and Jobs in your workspace.
All-Purpose Compute
Jobs
SQL Warehouses
If, as part of evaluating an All-Purpose Compute cluster for potential savings, granting the CAN_ATTACH_TO permission allows access to Spark metrics and better estimates of savings potential, before full management access is granted to enable the feature. The SELECT Automated Savings agent will begin monitoring all clusters automatically where this permission is granted.
Automated setup
Running the following script will do all of the manual steps above (apart from creating the secret). This script provisions a Databricks service principal for select.dev by creating/finding the SP, assigning it to the target workspace, granting system catalog access, and setting up a SQL warehouse. If USE_AUTOMATED_SAVINGS is enabled, it also iterates all workspaces in the same region and grants the SP CAN_MANAGE permissions on all jobs, clusters, and warehouses to enable automated savings features. If IP_ALLOW_LIST_ENABLED is True, it will create an allowed list of IPs for all the workspaces as well. Copy and save to a file locally (e.g. setup-select.py), edit the first 10 lines with your details, and then just run python setup-select.py:
Add workspace to SELECT
- Navigate to settings: https://select.dev/app/settings
- Go to the Databricks tab and click the Add Workspace button
- Enter a memorable workspace name, and fill out all the details you have noted in the previous steps:
- Account ID
- Workspace URL
- Warehouse ID
- Client ID
- Client Secret
- Click Add and you are good to go!

