

Connecting Okta
SELECT's Okta integration is an add-on feature. Please contact SELECT to determine your eligibility and receive a quote.
To manage access and authentication to SELECT using your Okta account, please follow the steps below.
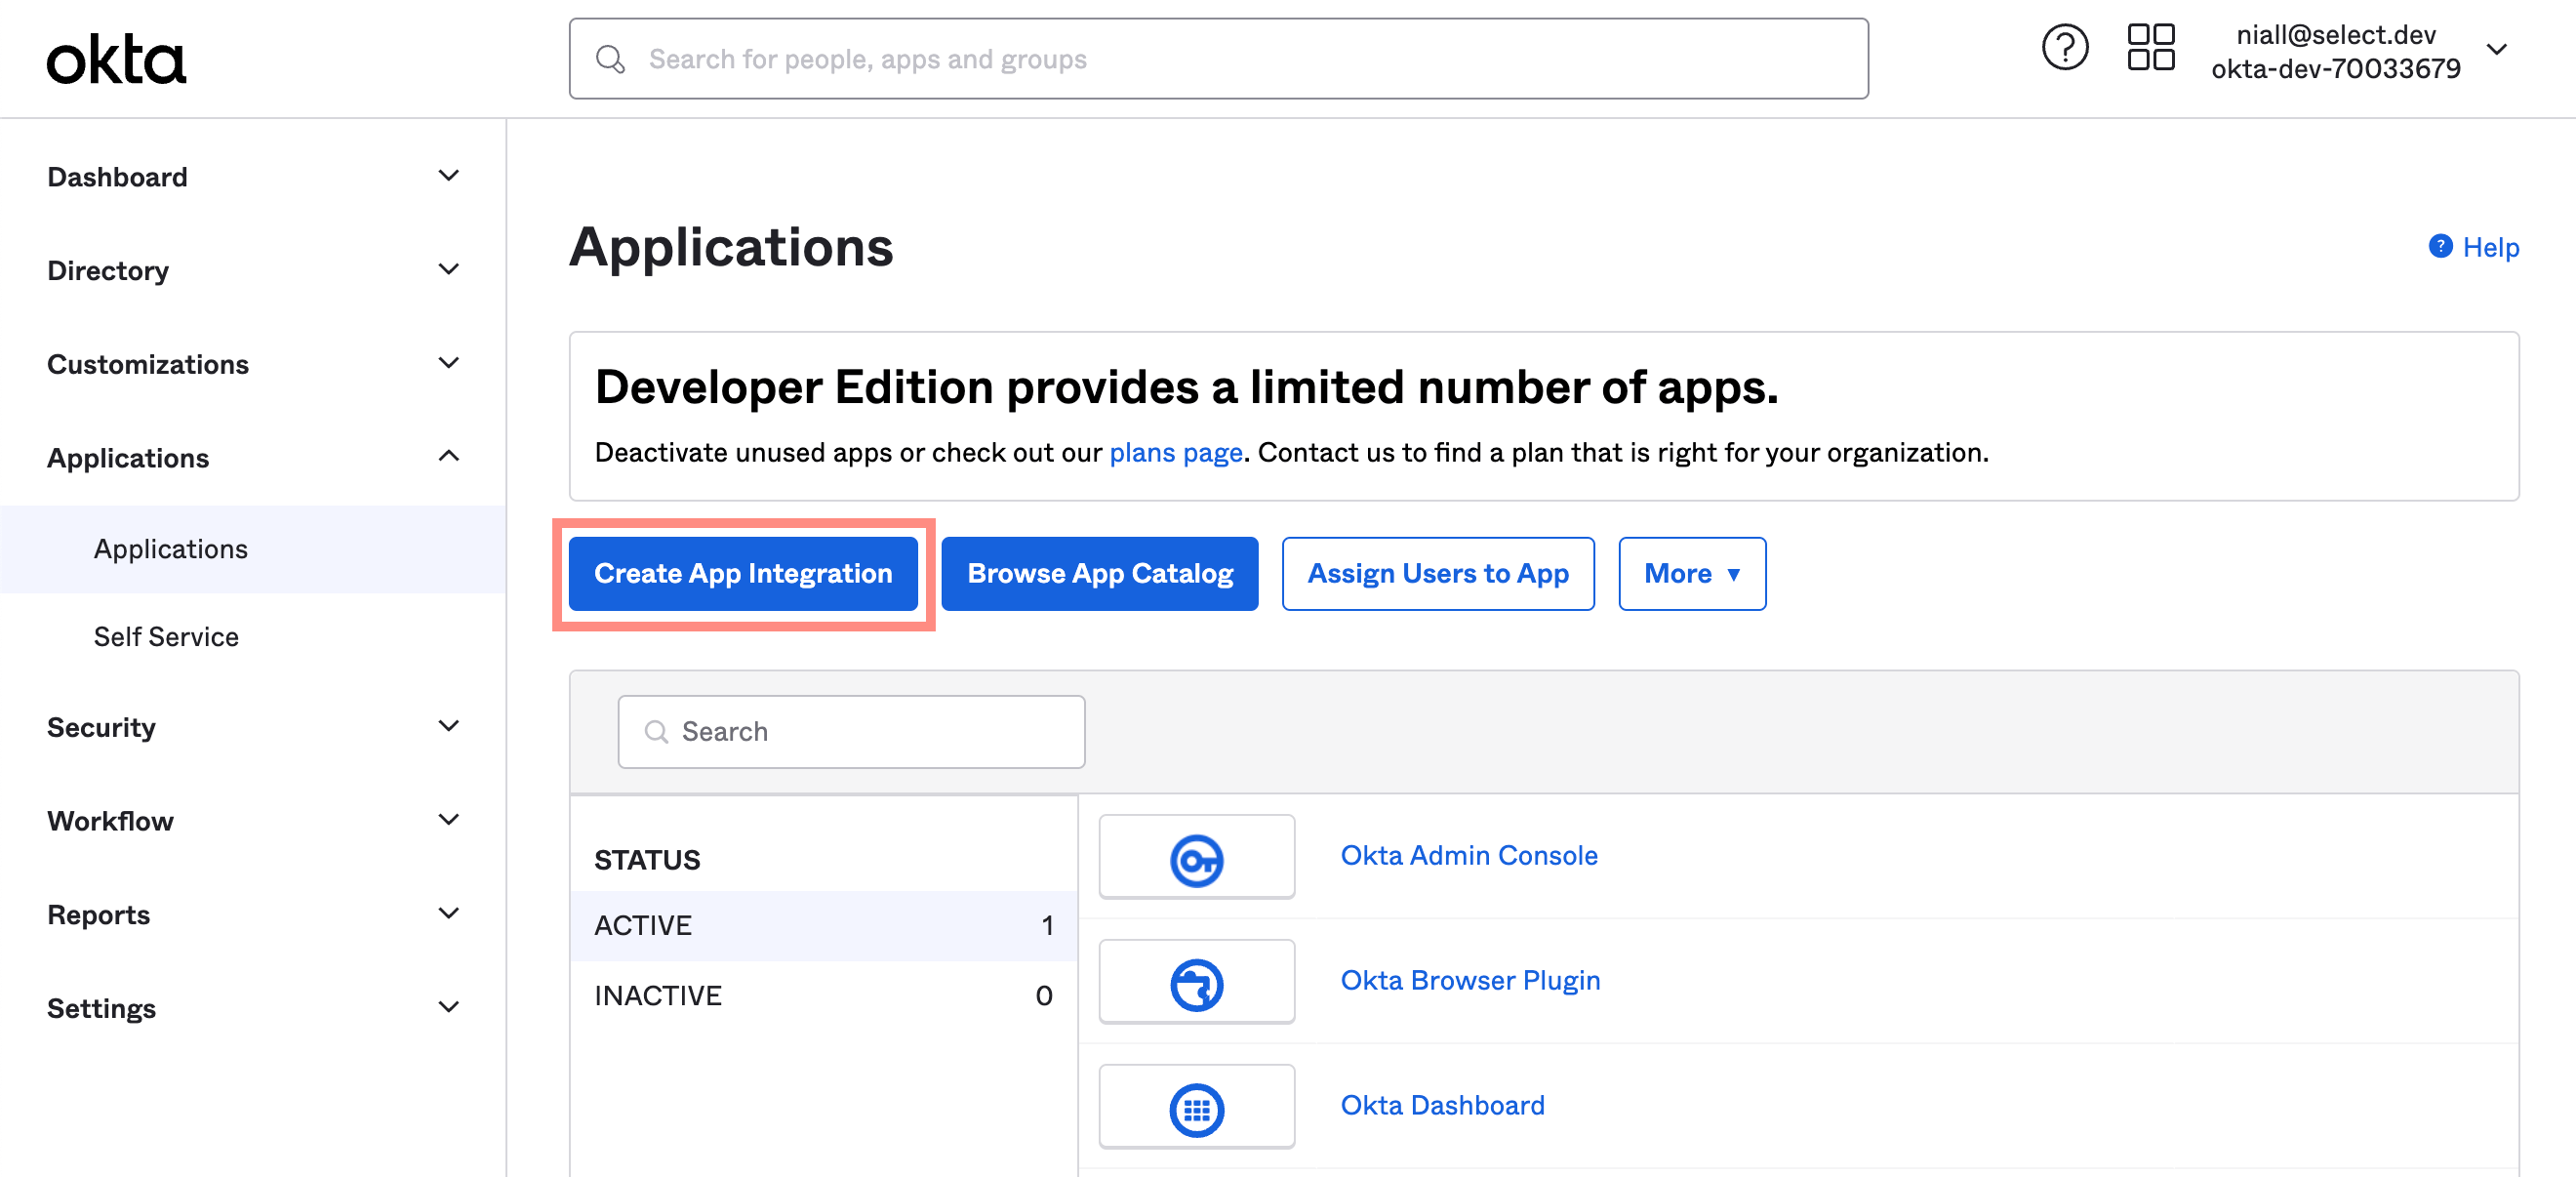
Step 1: Create App Integration
Launch the create app integration flow in the Okta console.
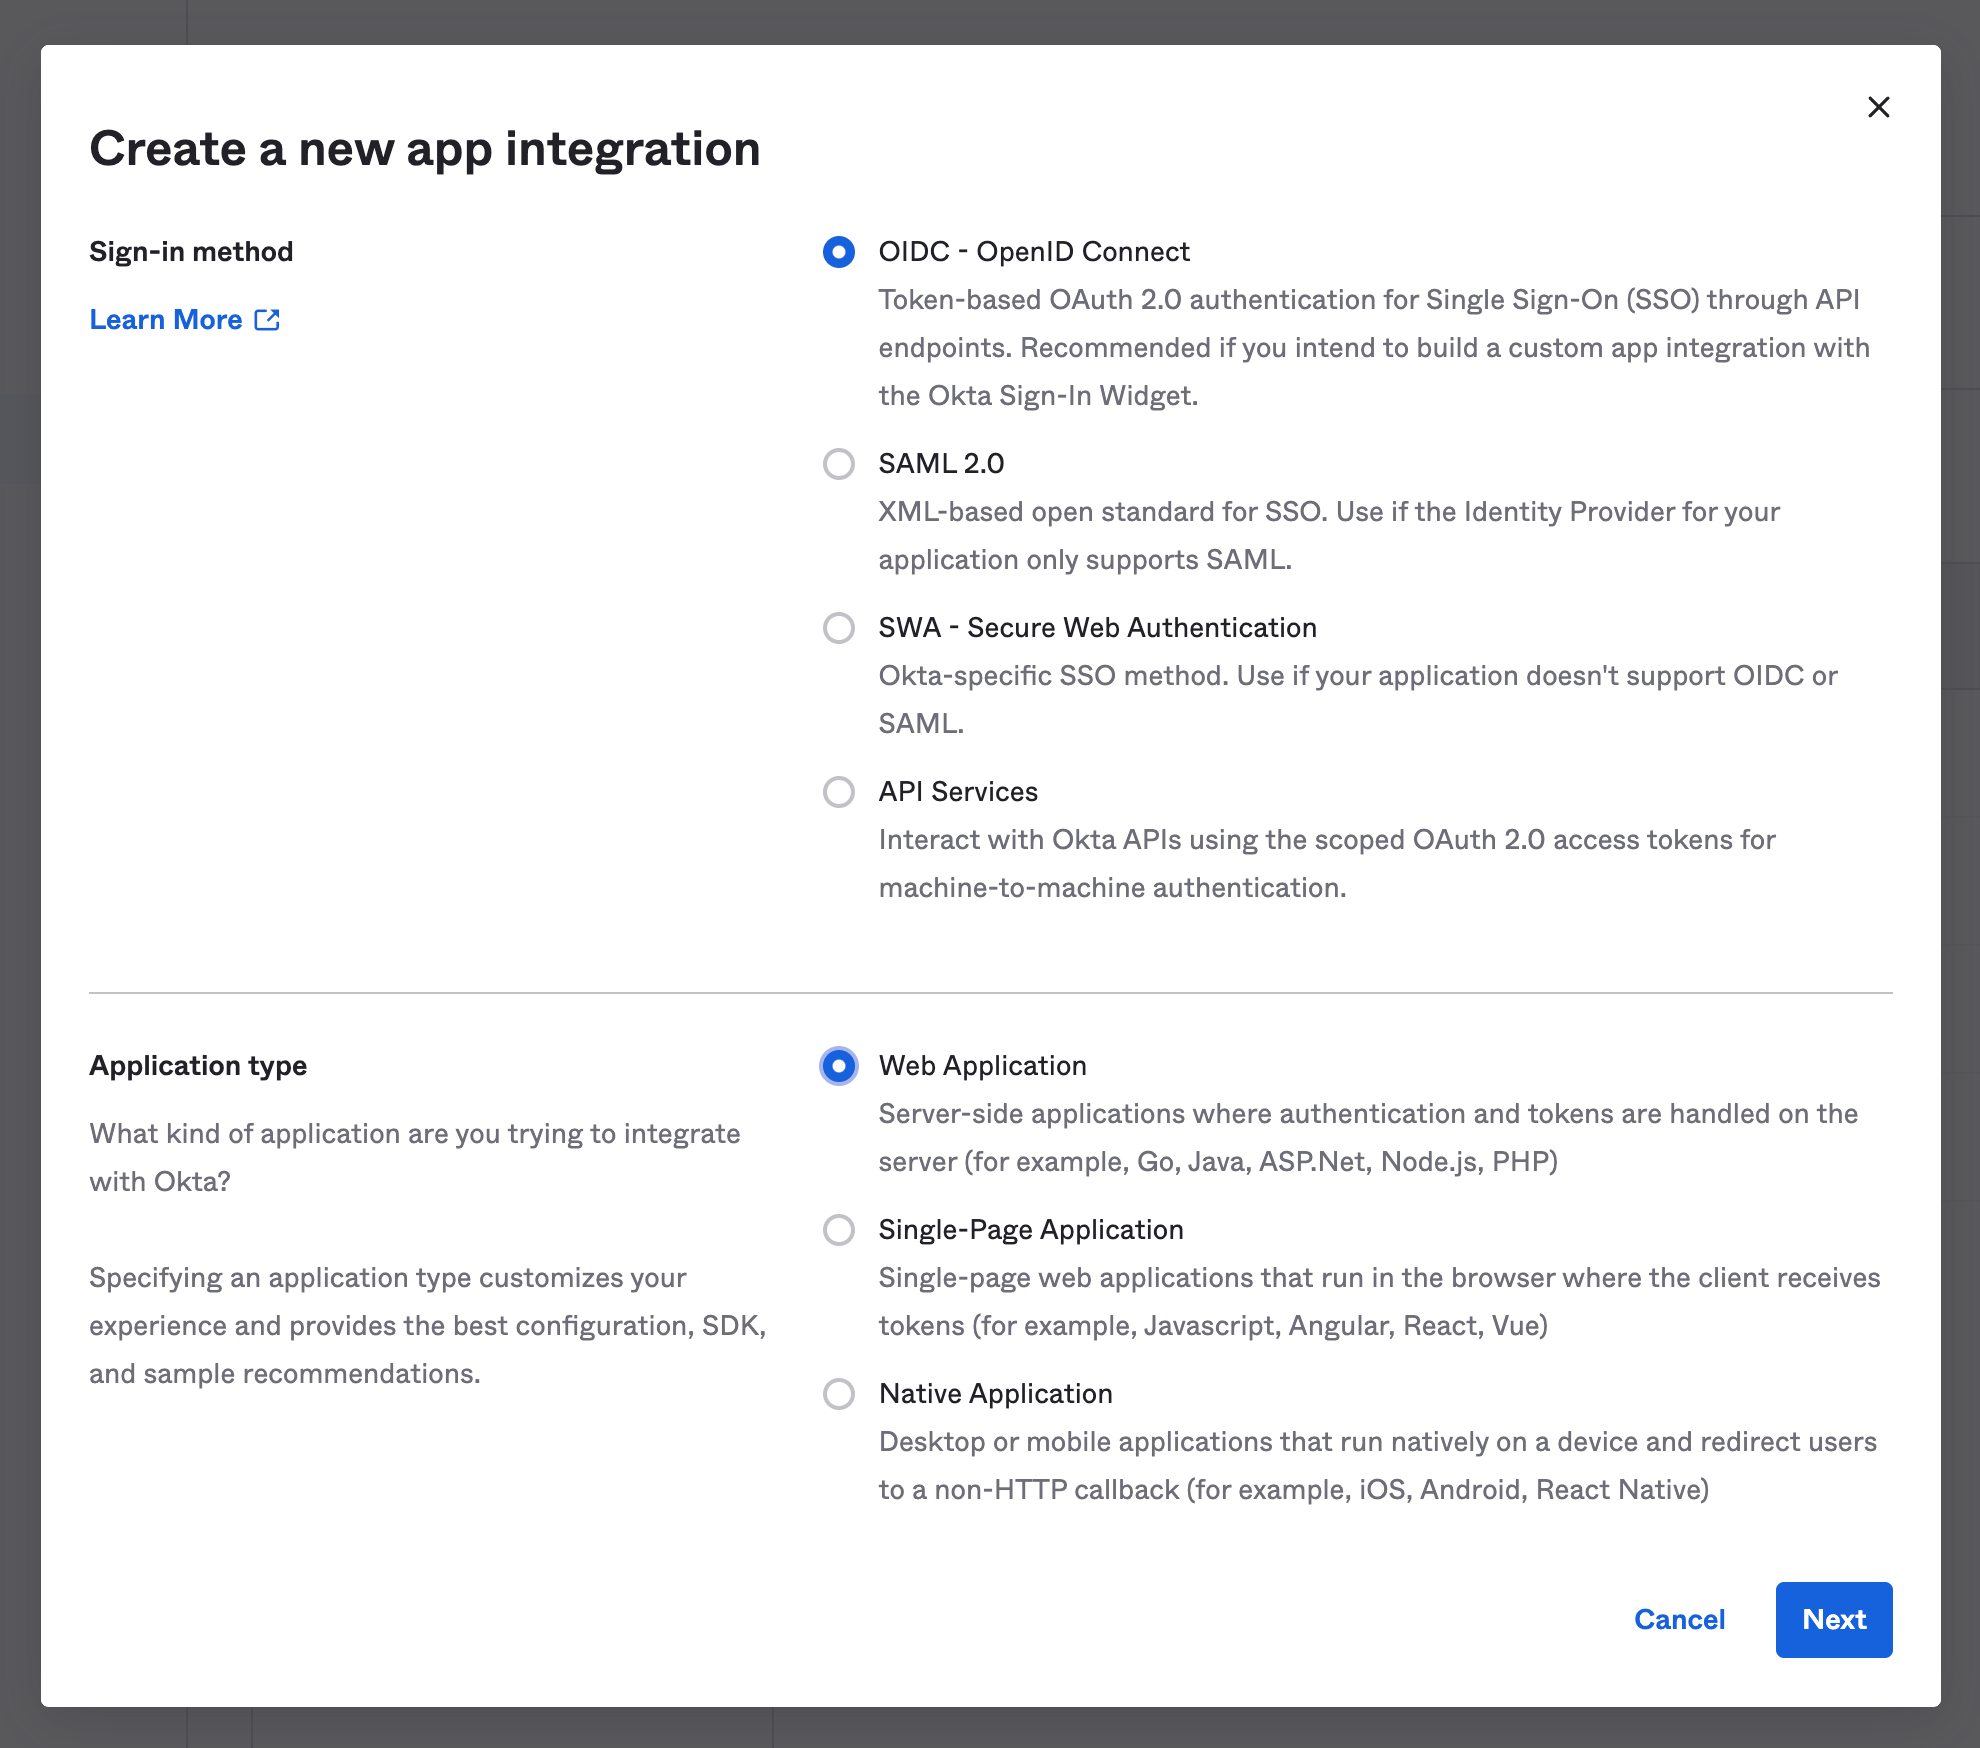
Select OIDC for the sign-in method, and web application as the application type.
On the next page, set the app name to SELECT. Check all the grant type boxes so that they match the screenshot below. Set the sign-in redirect URI to https://auth.select.dev/login/callback.
On the next page, scroll to ‘General Settings’ and click ‘Edit’. Under ‘Login’, set the ‘Login initiated by’ dropdown to ‘Either Okta or app’. Under ‘Application visibility’, check the box next to ‘Display application icon to users’. You can find your ORGANIZATION_ID value in settings.
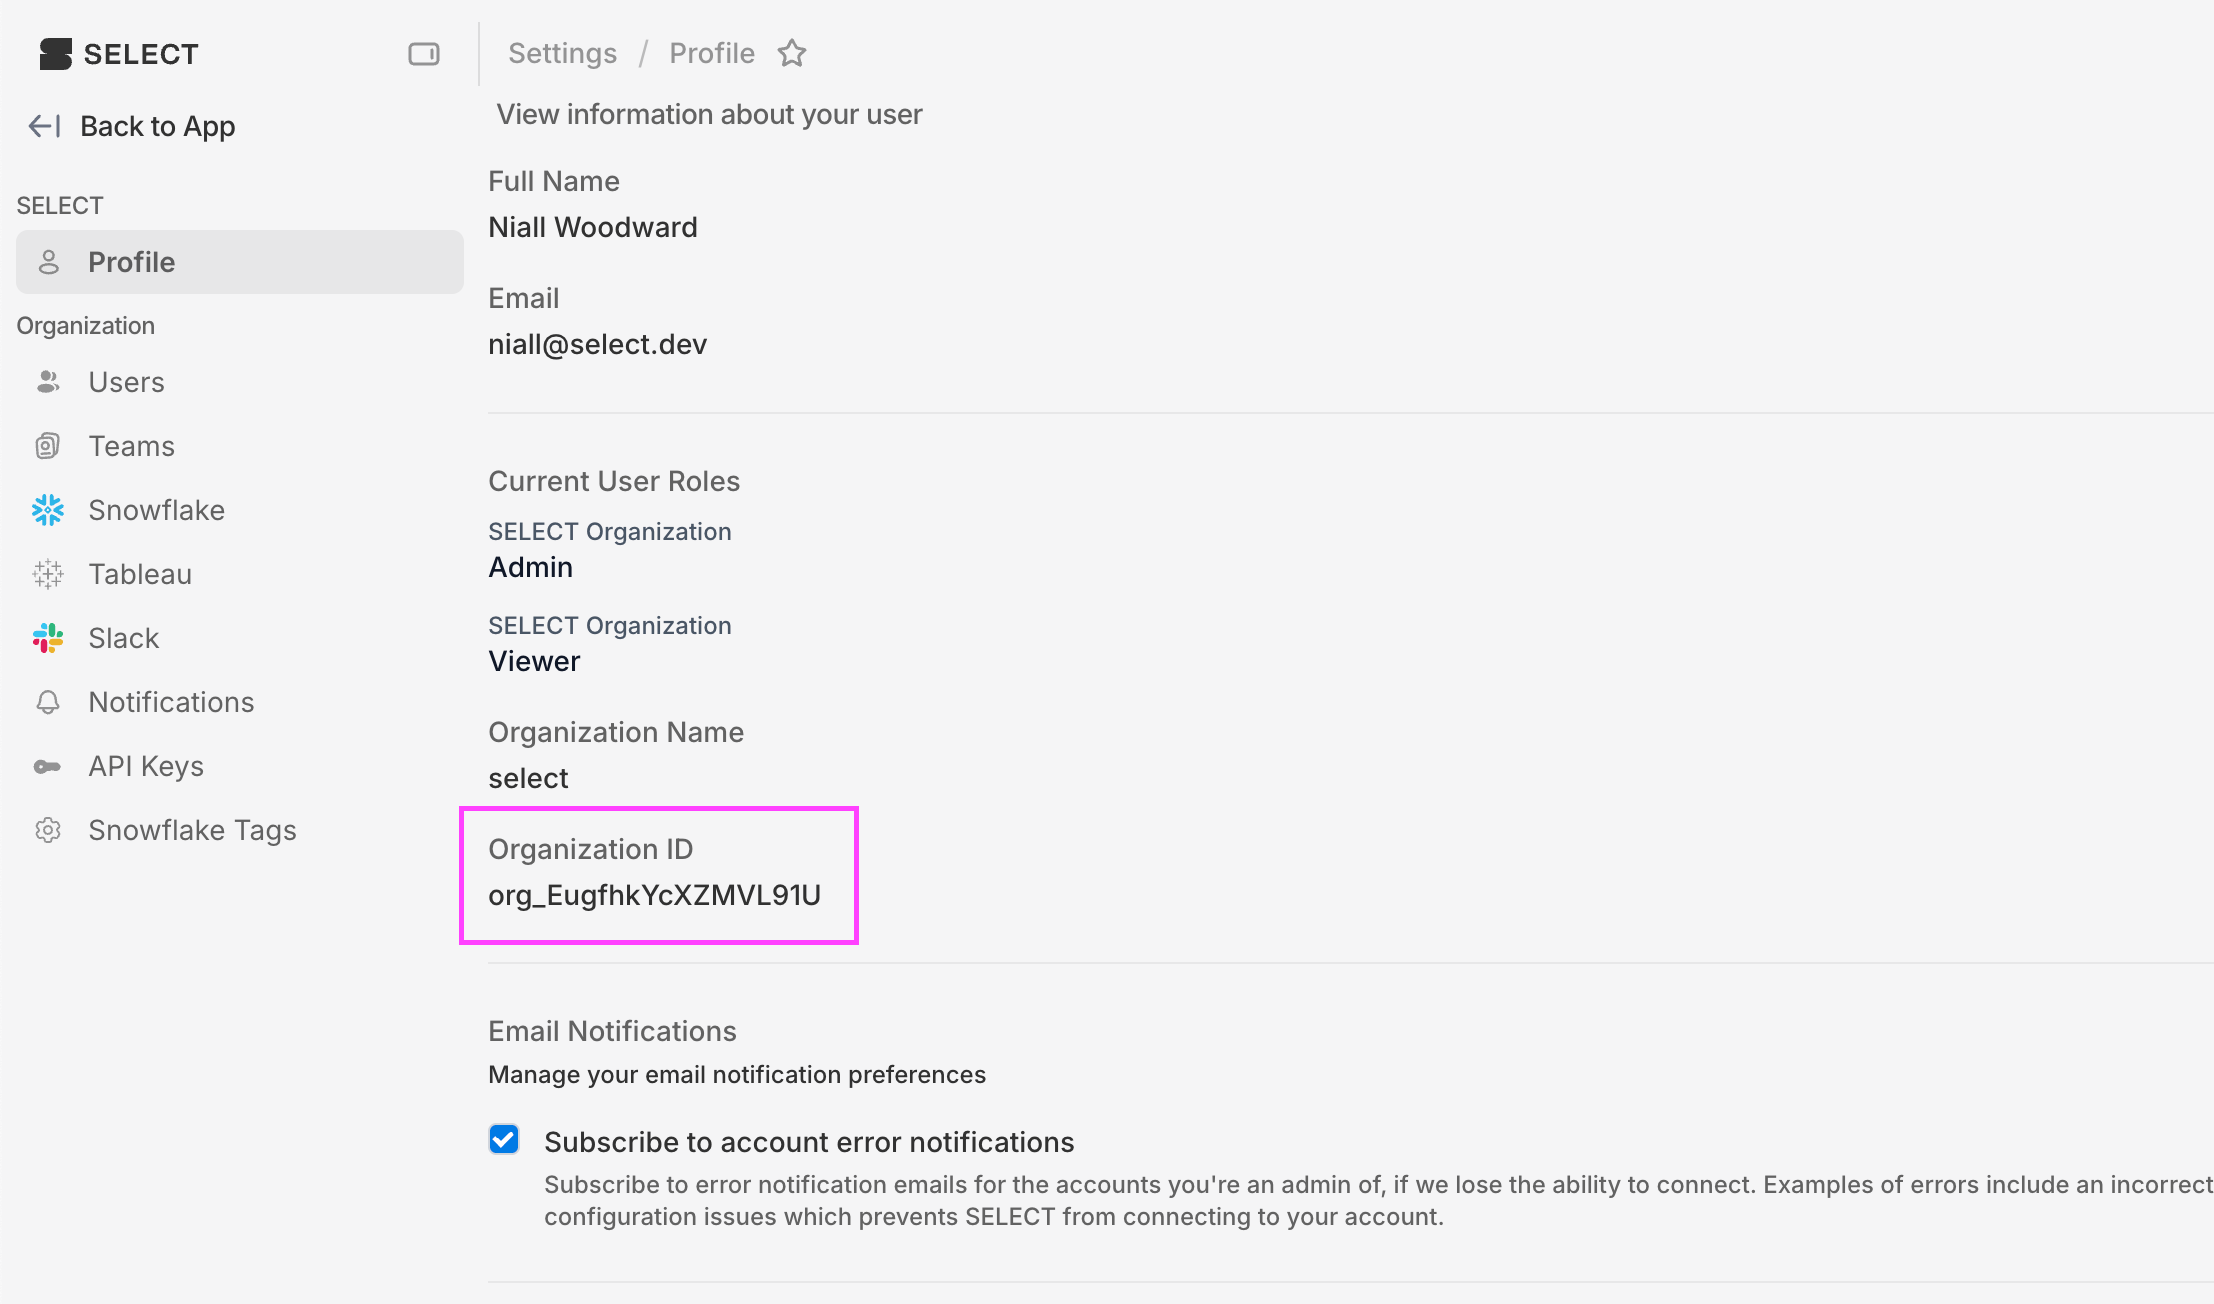
Set the Initiate Login URI value to https://select.dev/api/auth/login?organization=ORGANIZATION_ID, replacing ORGANIZATION_ID with the value you have.
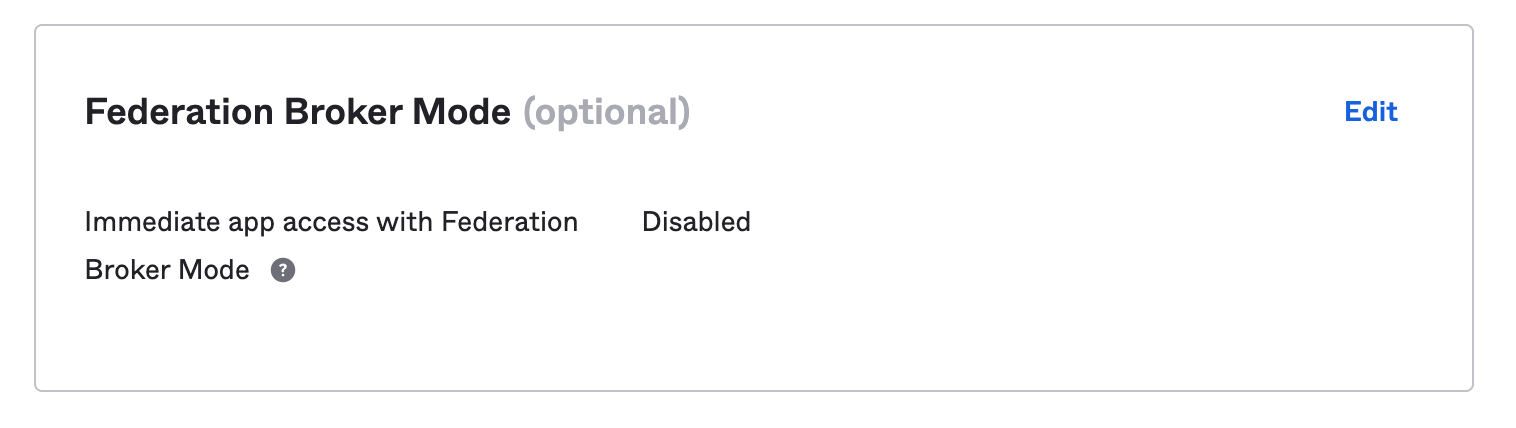
Set Federation Broker Mode to Disabled to ensure that the app tile shows up for users. Add the required assignments under the ‘Assignments’ tab at the top of the page.
Step 2: Add SSO Connection in SELECT
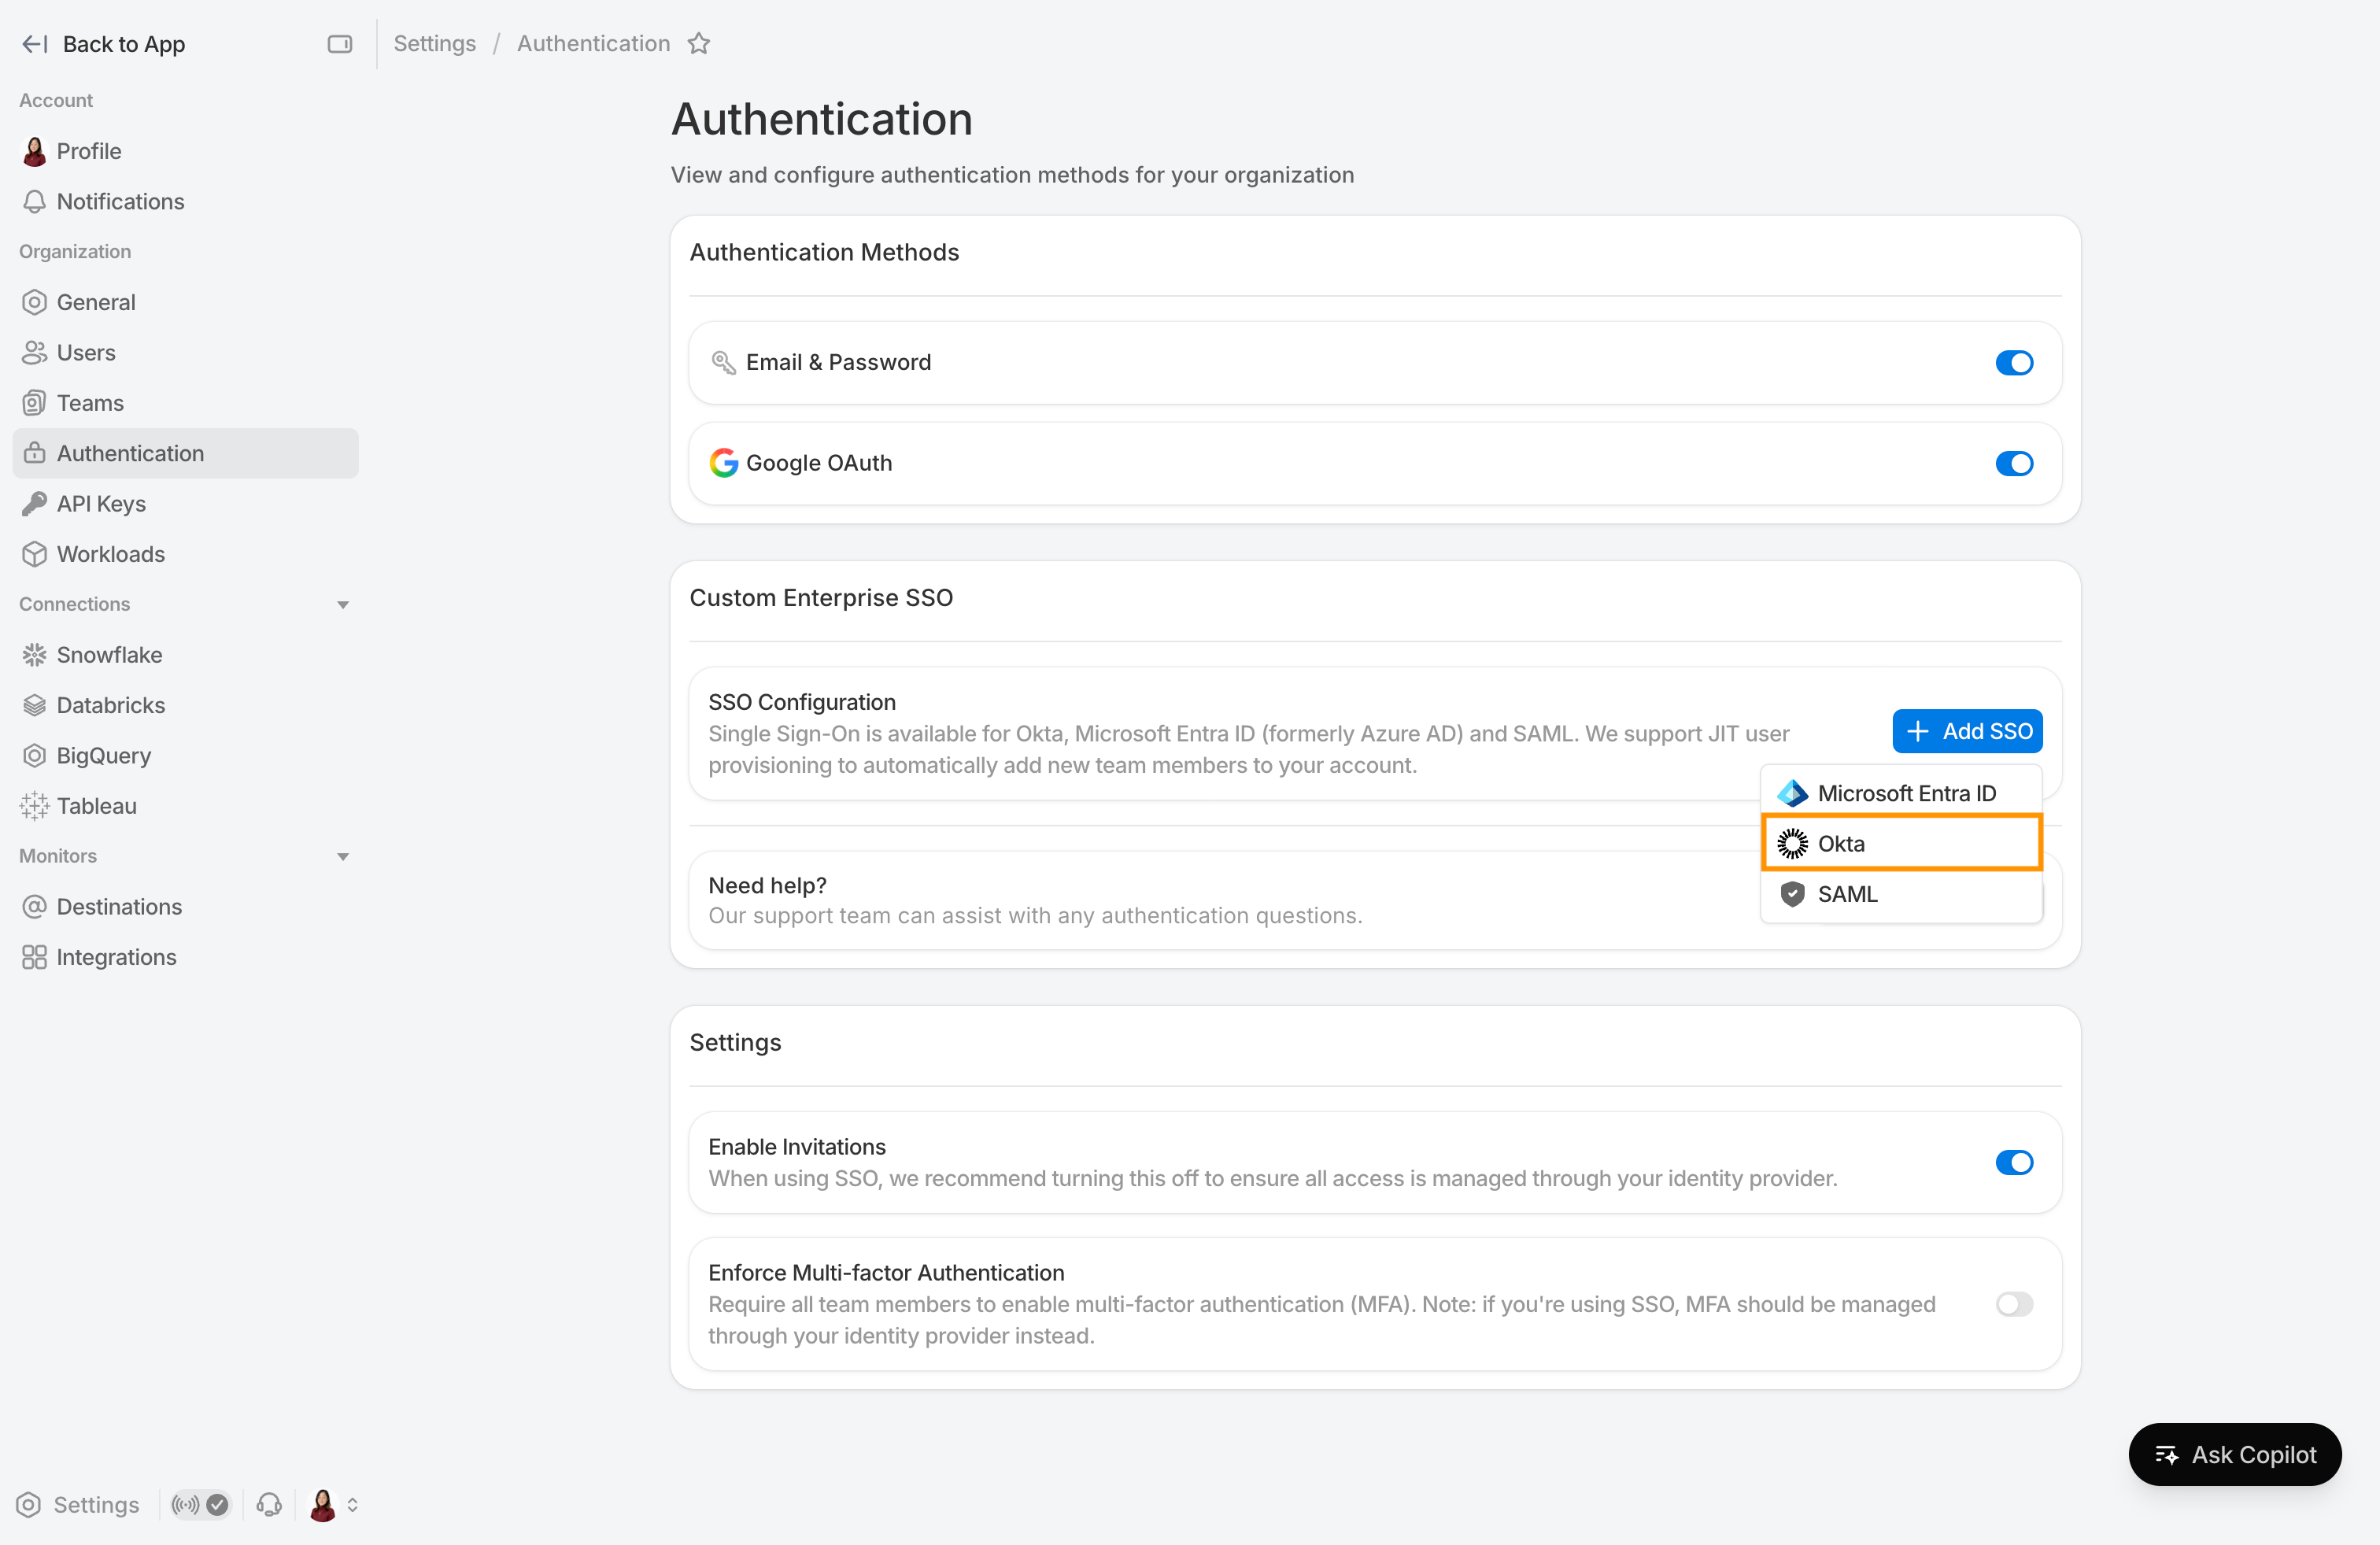
Once complete, head over to SELECT and navigate to Settings → Authentication. In the Custom Enterprise SSO section, click Add SSO and select Okta from the dropdown.
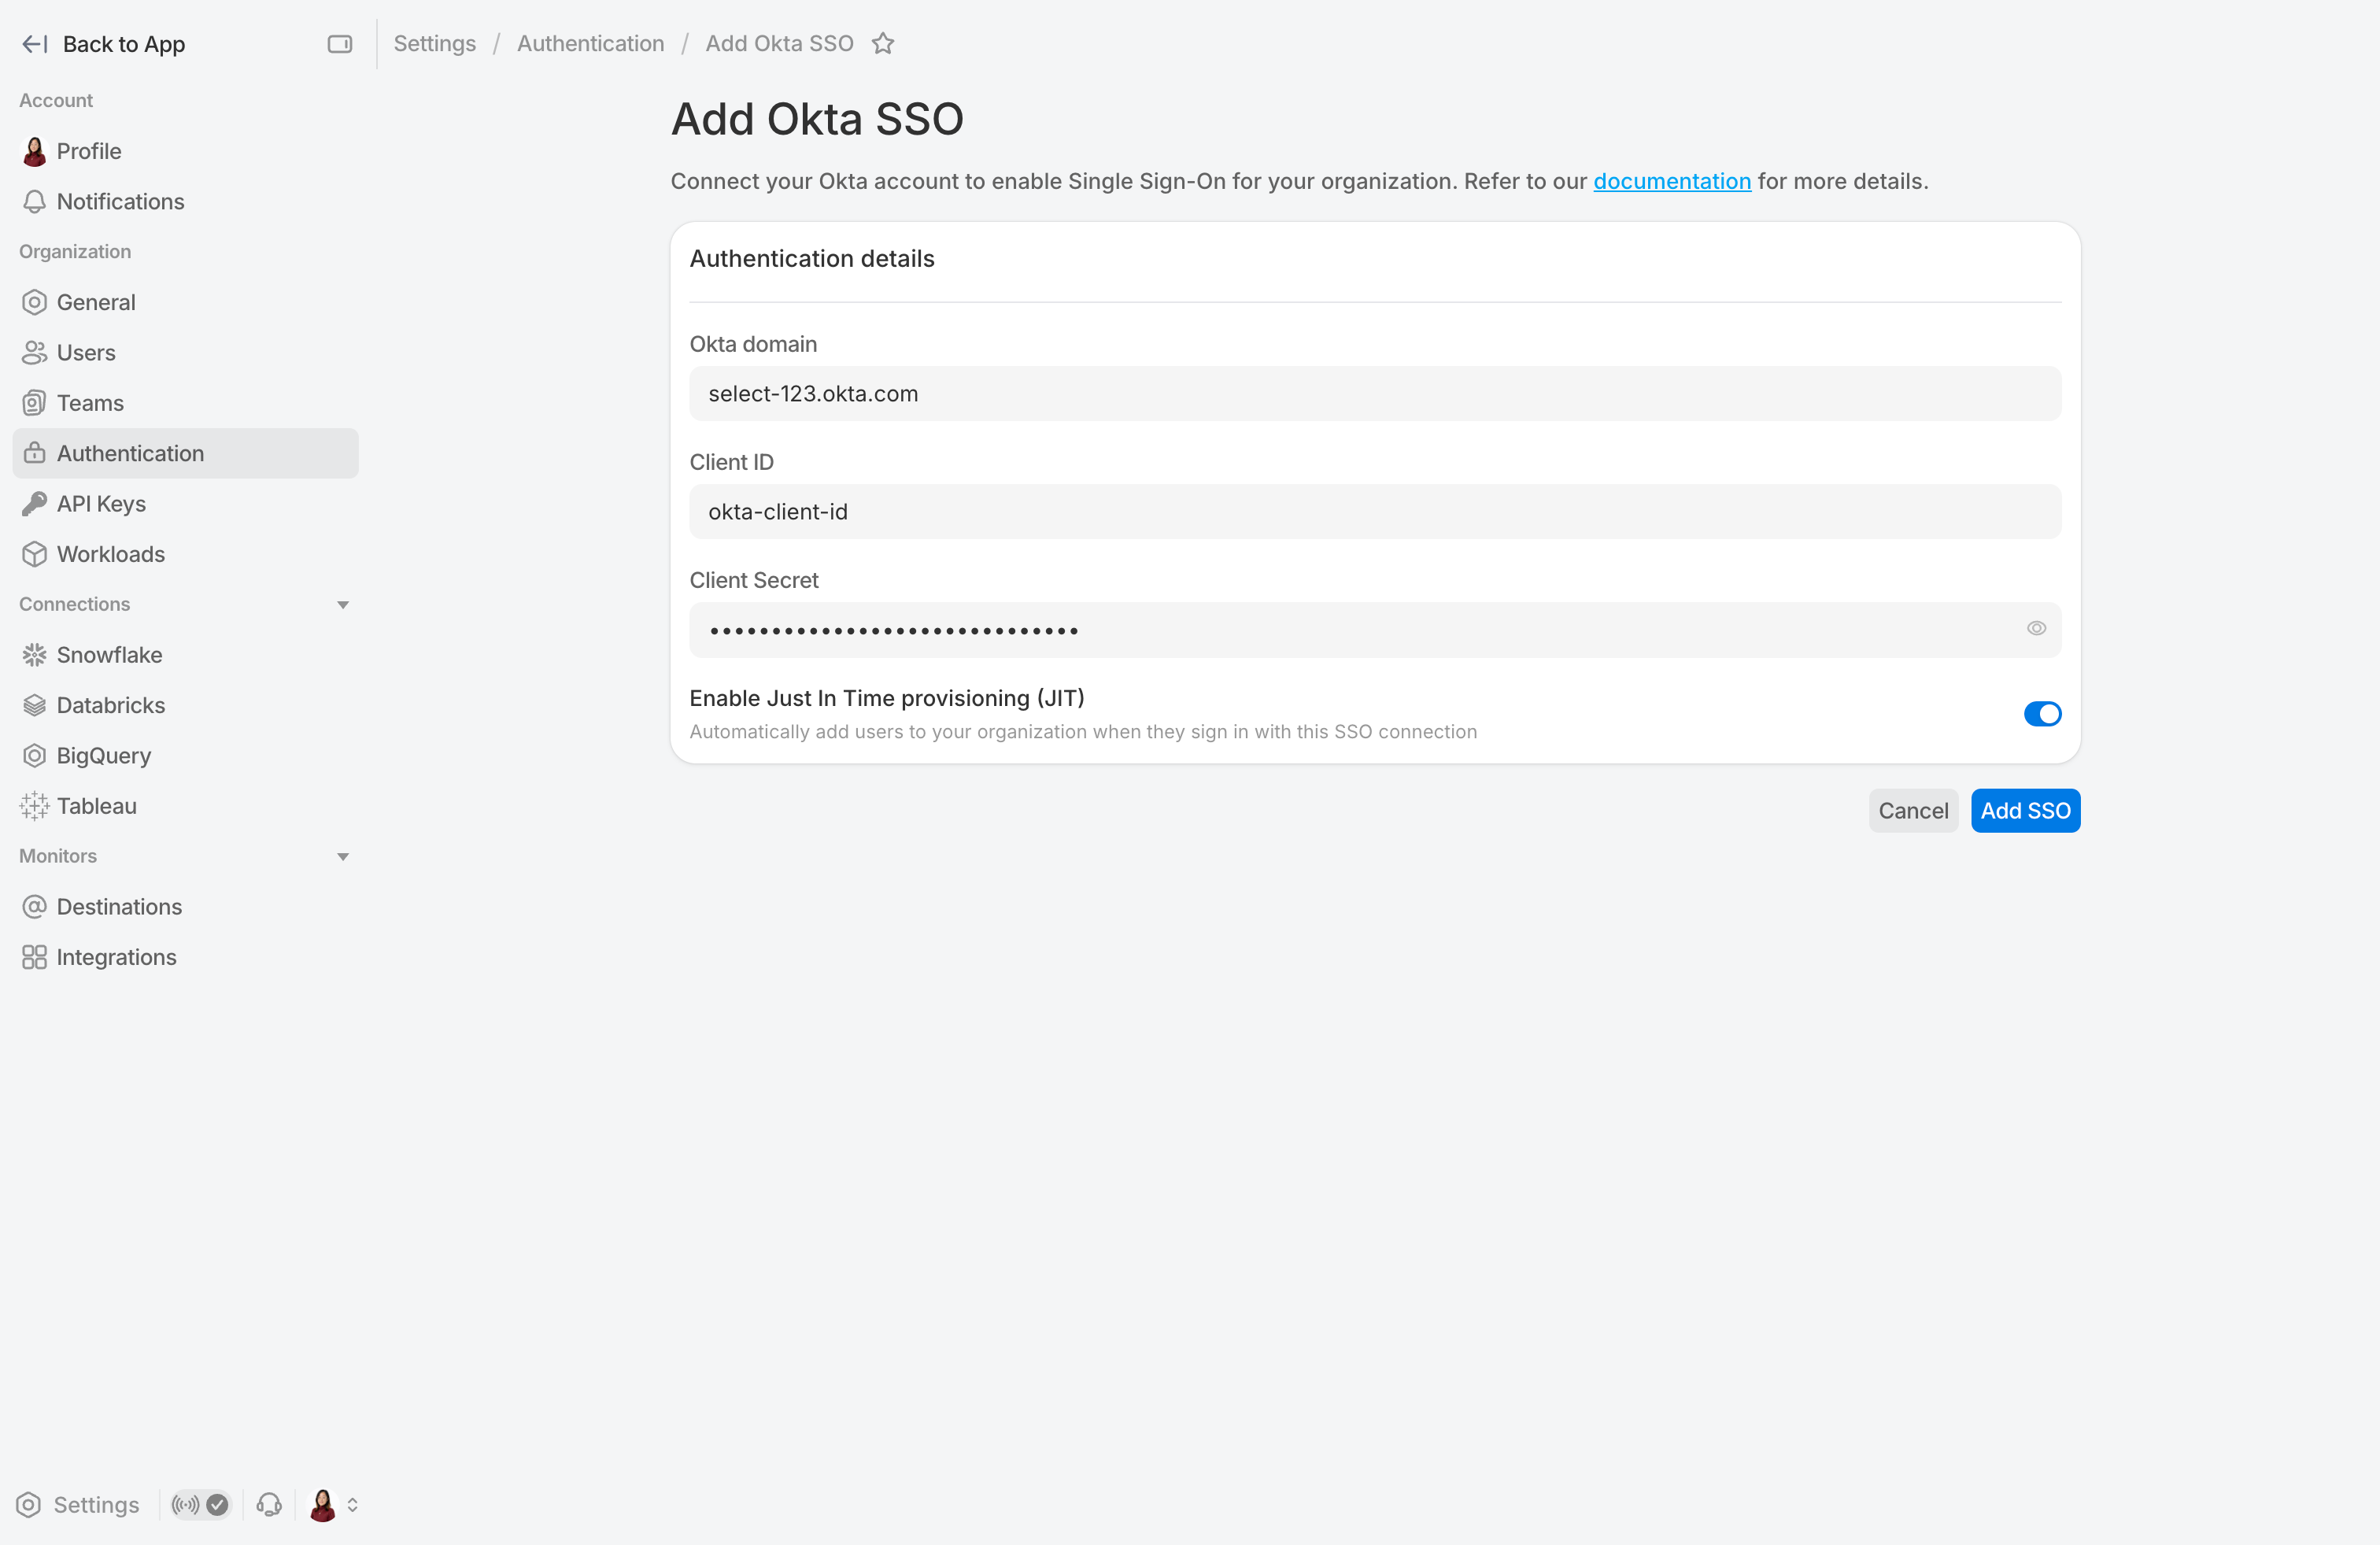
Next, fill out the Add Okta SSO form. Details about where to find the domain, client ID, and client secret on the Okta console are listed below:
- Client ID and secret for the newly created application integration
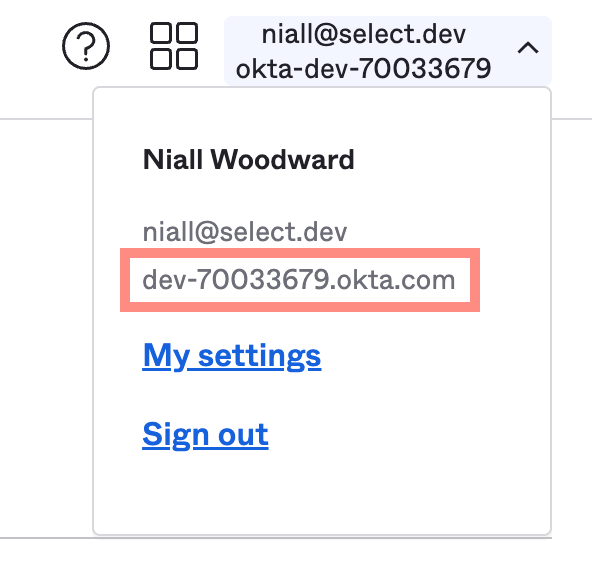
- The Okta domain. This is usually the domain found by clicking your email address in the top right, as shown in the below screenshot. If you've configured the app to use a custom domain, however, please specify that instead.
Click Add SSO to complete. You should then see your newly created SSO connection under Authentication Methods.
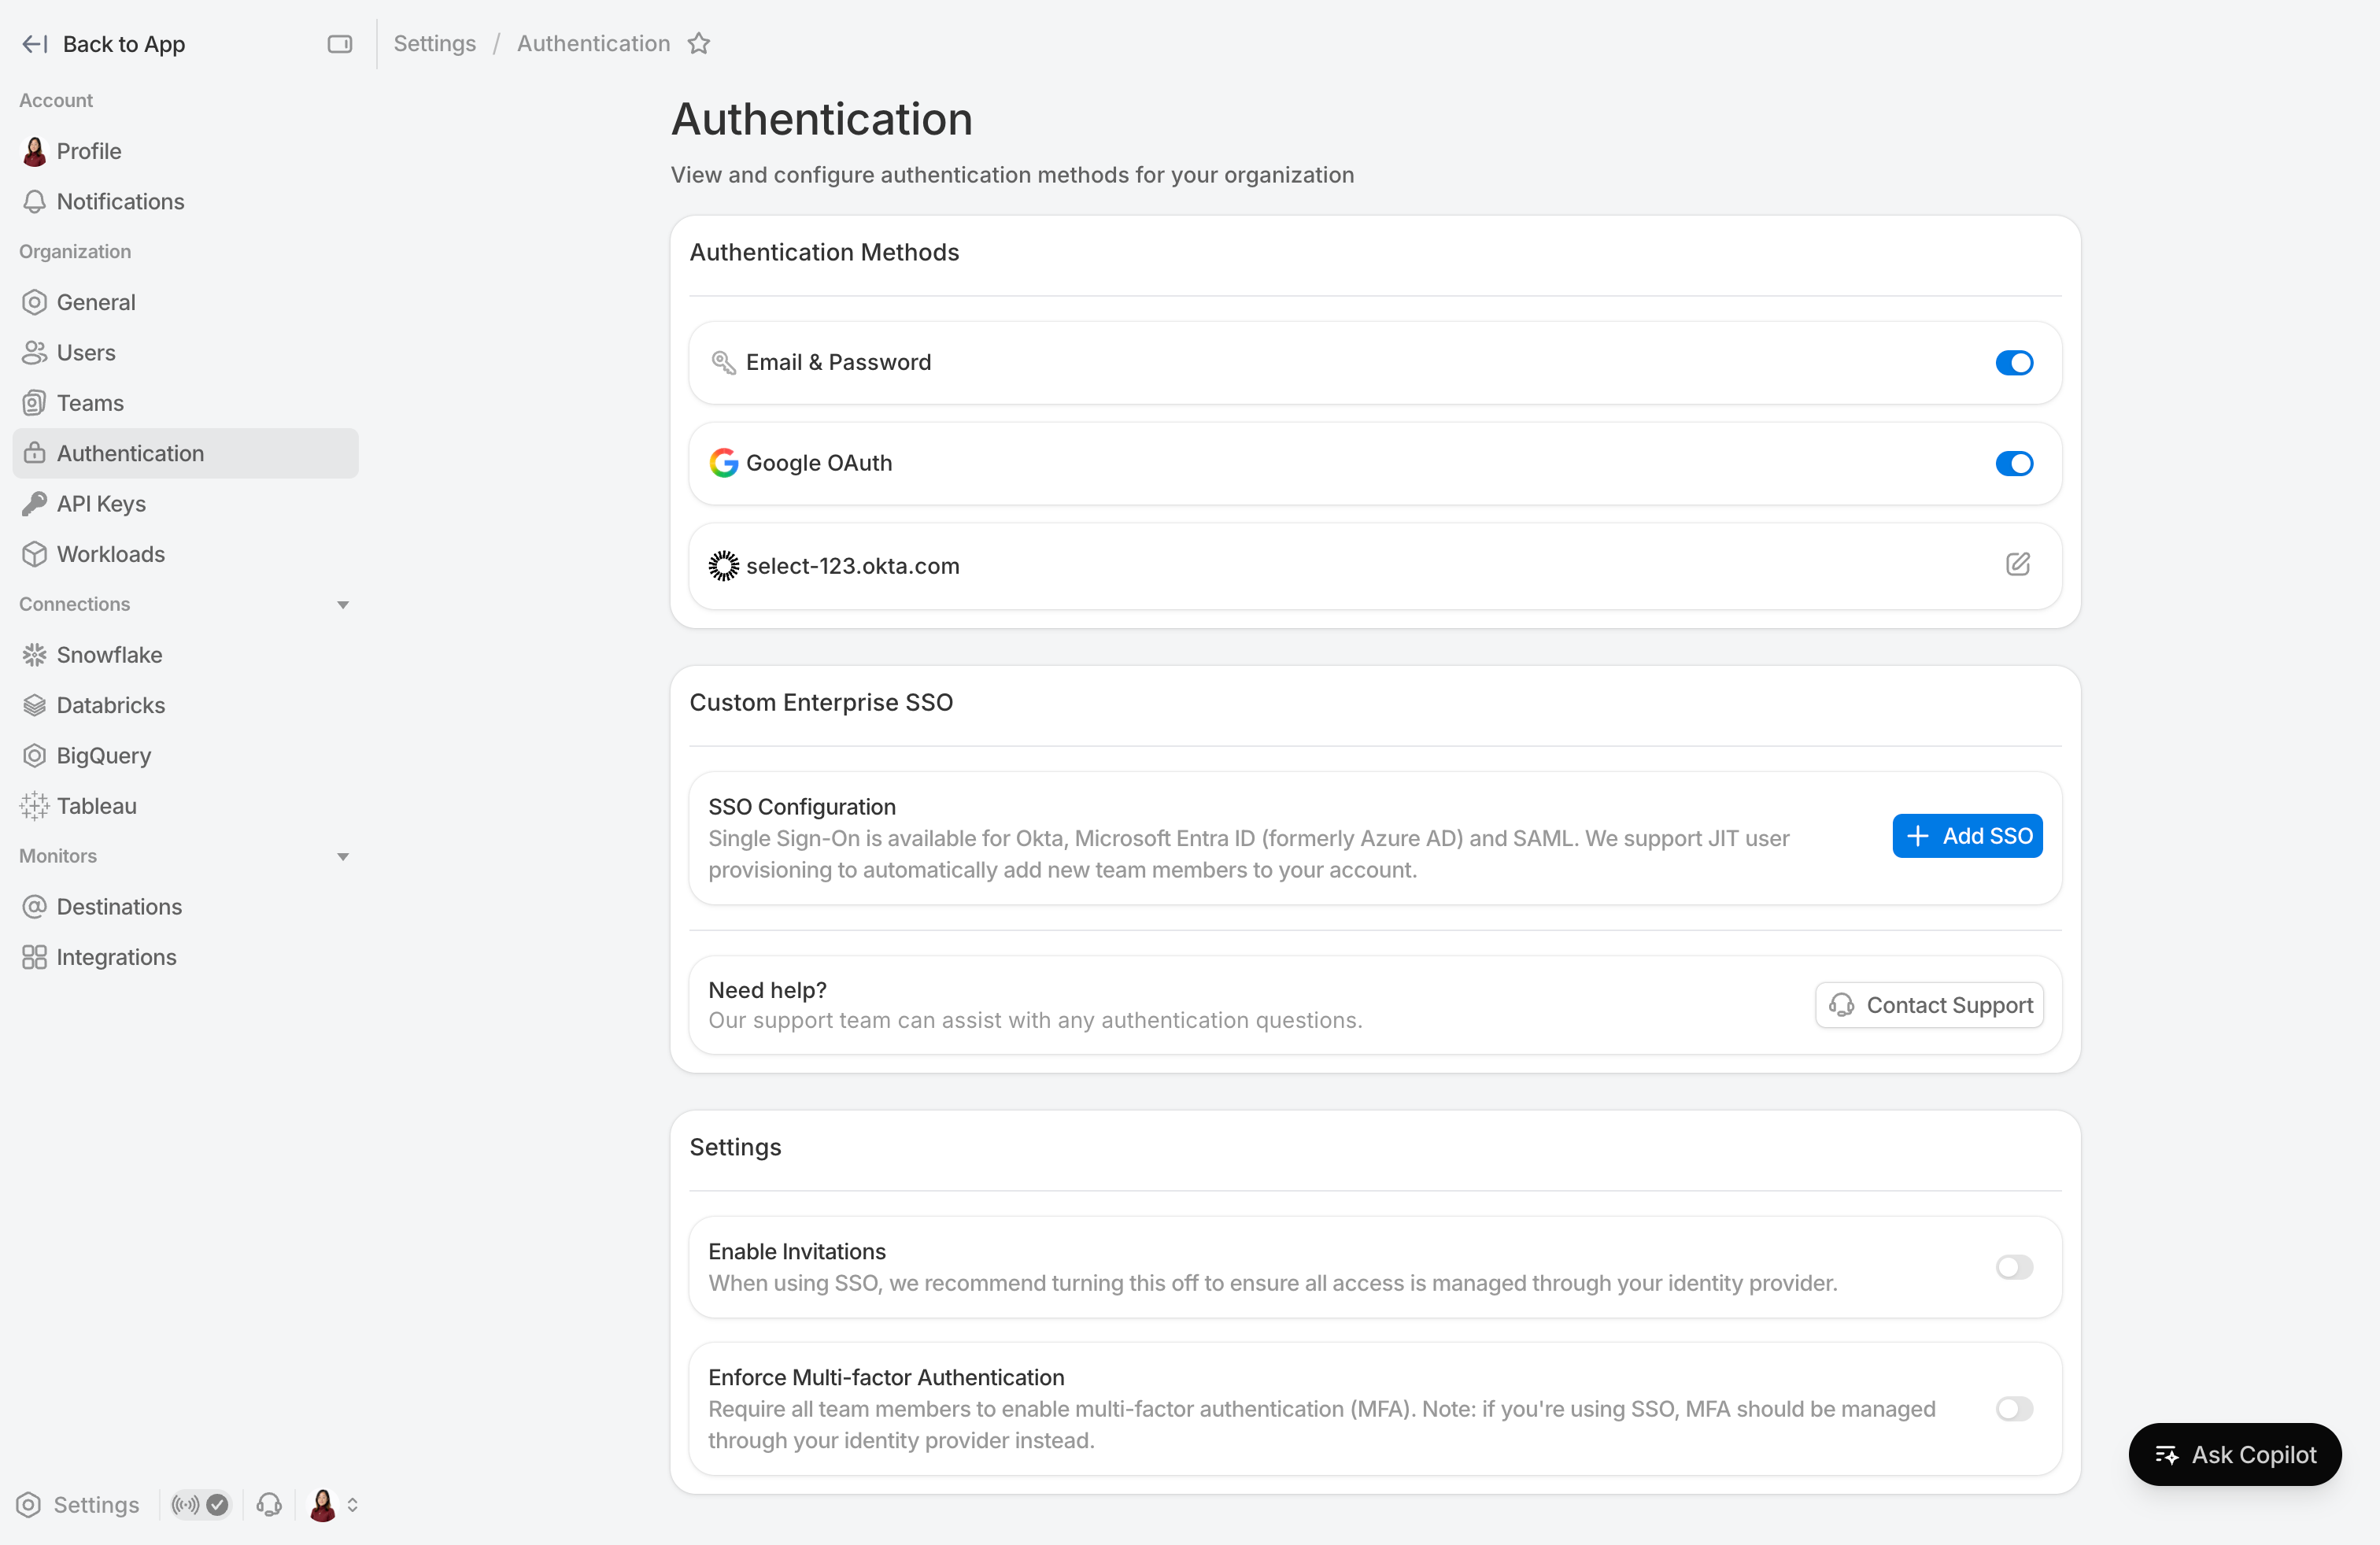
Creating an SSO connection will automatically disable manual user invitations.
Mapping SSO Groups to Roles in SELECT
Through the User Roles & Permissions in SELECT, users can enable fine-grained access control in SELECT.
Rather than manually assigning each user a role in SELECT, you can configure roles to be automatically assigned based on the user's Okta SSO group.
To do this, the SELECT integration you set up in Okta needs to be configured to pass your employee's Okta groups to SELECT. Follow the steps below to add the necessary group claims.
- In Okta, click Applications in the sidebar
- Click the SELECT app
3. Click the Sign On tab
4. Scroll down to OpenID Connect ID Token section and click Edit.
5. Set the Group claims type to Filter
6. Set Groups claim filter to groups (which is pre-filled) and for pattern pick matches regex and enter .* if you want to send along all the groups. If you want to restrict the groups that are made available to select choose another option. You can learn more about the Groups Claim here.
7. Click Save
8. Log in / out of SELECT, and validate that the SSO groups are being exposed to SELECT by checking the user's roles
9. Head back to our Roles documentation and add the group mappings in SELECT.

