

Snowflake Intelligence: Overview, Pricing & Cost Monitoring
Jeff SkoldbergFriday, October 10, 2025

What is Snowflake Intelligence?
Snowflake Intelligence is a new UI accessed from ai.snowflake.com that lets you ask questions about your data in plain English and get answers back instantly, complete with charts, table outputs, or natural language insights. This is an isolated app for business users who don’t want to see all of the complexity of the Snowsight UI. They don’t need to explore databases, schemas, roles, query history, etc. They just want a streamlined chat interface with no SQL required, no waiting for analytics engineers to get them answers. It's powered by AI agents that orchestrate between structured data (via Cortex Analyst), unstructured data (via Cortex Search), and custom tools to give you a complete picture of your business.
Think of it as ChatGPT for your Snowflake data, except it actually knows your business definitions, respects your access controls, and has fewer hallucinations due to leveraging agents and semantic models built by your internal team.
Now, business people can ask questions in their own words, such as "show me Q4 revenue by product category" without knowing which tables contain revenue data or how products are categorized. A supply chain analyst can ask "what issues are customers reporting with our winter jackets?" and get insights from both structured sales data and unstructured support tickets. The agent figures out what tools to use and how to combine the results.
All of this is not without some upfront work to set up properly, and the costs can sneak up on you if you're not careful. Let's break down how it works, what it costs, and how to keep your bill under control.
How to use Snowflake Intelligence
Snowflake Intelligence uses agents, which are AI models connected to one or more semantic views, semantic models, Cortex Search services, and tools. The magic happens through a two-phase workflow: configuration and usage.
Phase 1: Setting up infrastructure and agents
First, create the database and schema structure for Intelligence:
By default, Snowflake Intelligence uses the default role and warehouse of the user, so make sure users have these configured.
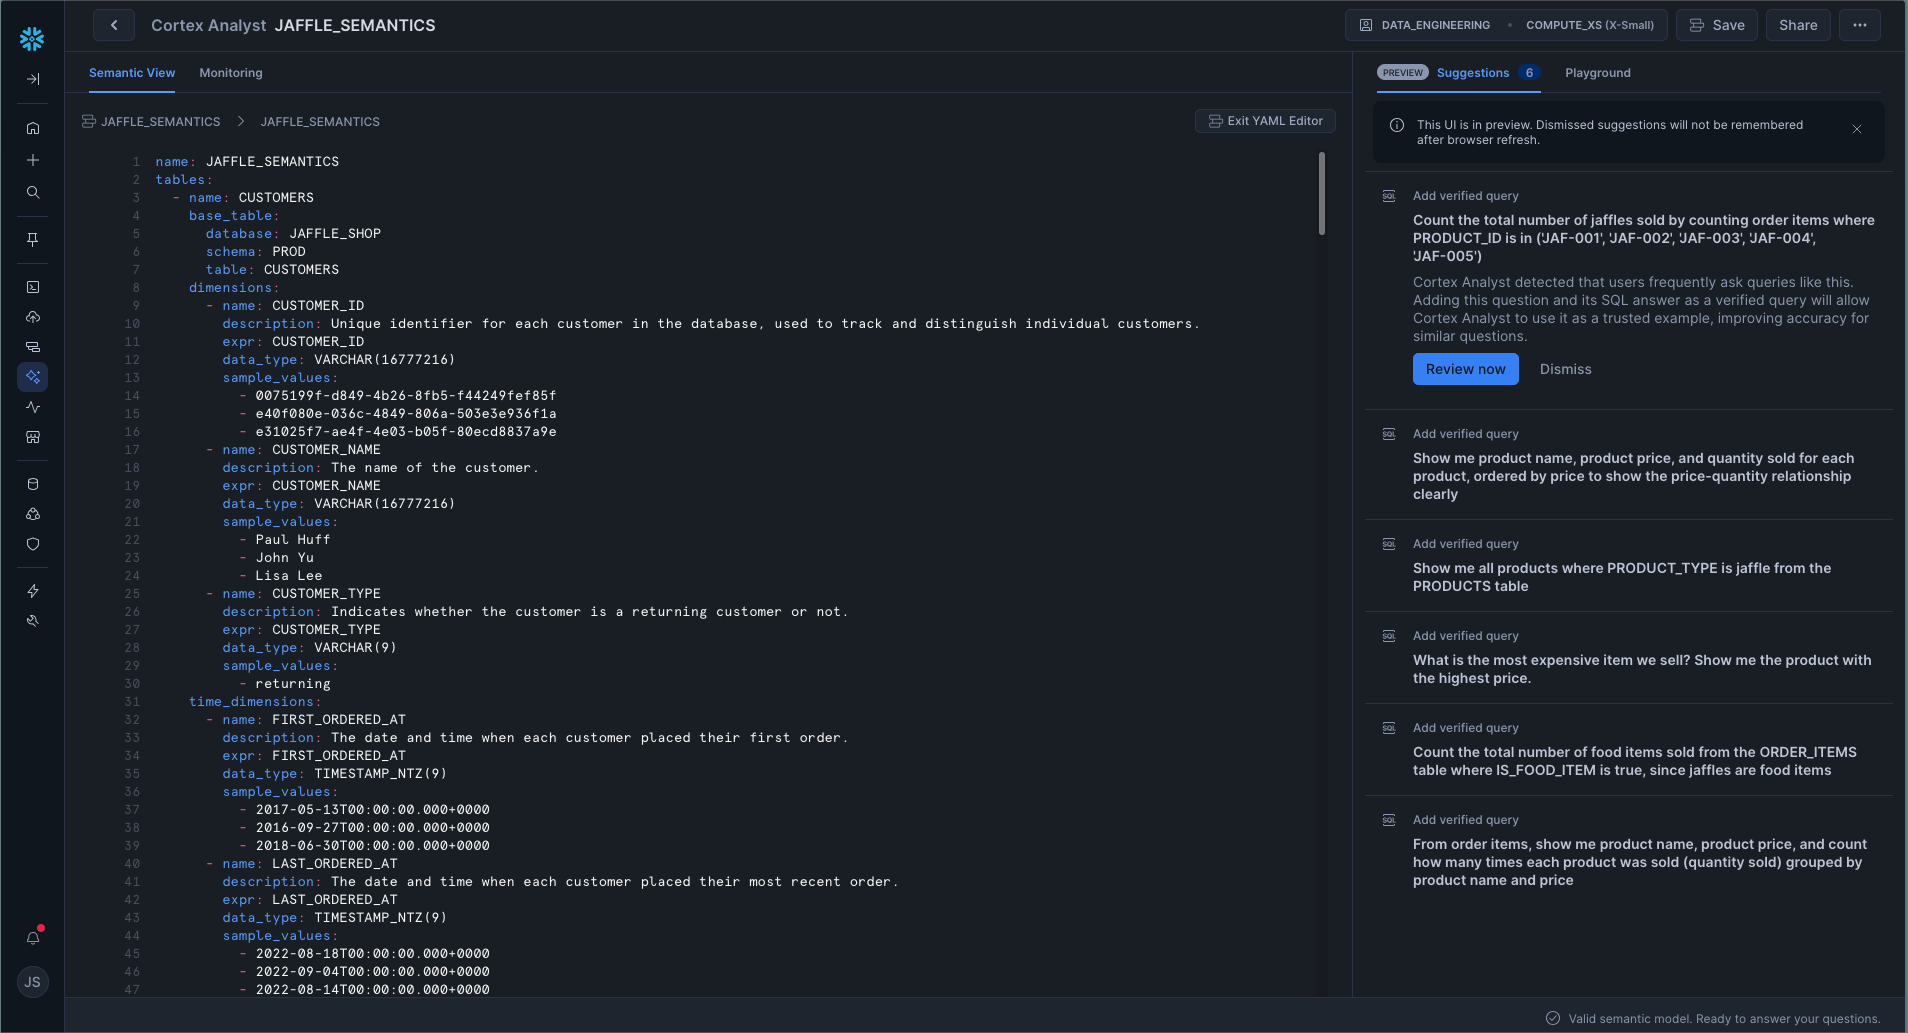
Phase 2: Building semantic views for structured data

A semantic view maps business terminology to your actual database schema. Instead of requiring users to know that revenue lives in fact_sales.amt_total_excl_tax, you define "revenue" as a business concept.
You can create semantic views through a wizard in Snowsight or by uploading YAML files. The wizard approach:
- Navigate to AI & ML → Cortex Analyst
- Click "Create new" → "Create new Semantic View"
- Select your tables and columns
- Define business metrics and relationships
- Add sample questions
Behind the scenes, this generates a YAML file. Semantic views address the mismatch between how business users describe data and how it's stored in database schemas. Here's a minimal example:
The key is being thorough with descriptions and synonyms. If someone asks about "total sales" and you've only defined "gross revenue," the agent might not understand.
The YAML can be edited directly in Snowsight, or you can edit through the wizard.
Phase 3: Creating Cortex Search services for unstructured data
See our blob post on Cortex Search for more details on how to implement this. Here’s a quick example.
For documents, support tickets, or other text data:
Cortex Search is useful for indexing and searching pieces of data with a lot of text, such as documents, conversations, and transcripts.
Phase 4: Creating and configuring agents
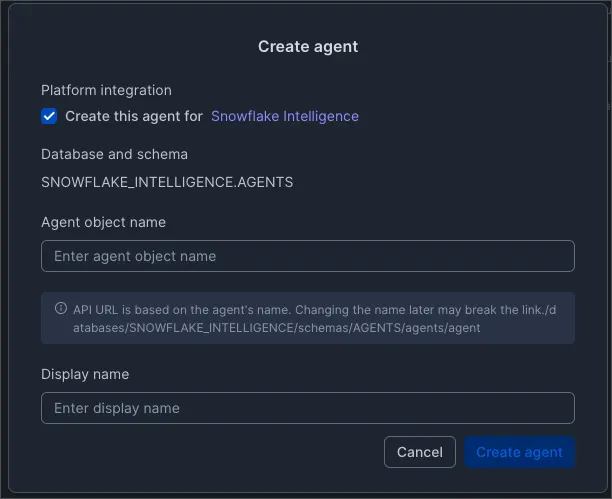
Now you wire everything together. In Snowsight:
- Navigate to AI & ML → Agents → Create agent
- Choose "Create this agent for Snowflake Intelligence"
- Give it a name users will see
- Add your semantic views as Cortex Analyst tools
- Add your Cortex Search services
- Configure orchestration instructions
- Set up role-based access
The agent now has access to both structured and unstructured data sources and can orchestrate between them. When a user asks a question, the agent:
- Parses the question
- Determines which tools to use
- Executes queries against semantic views (generating SQL via Cortex Analyst)
- Searches unstructured data (via Cortex Search)
- Combines results and generates visualizations
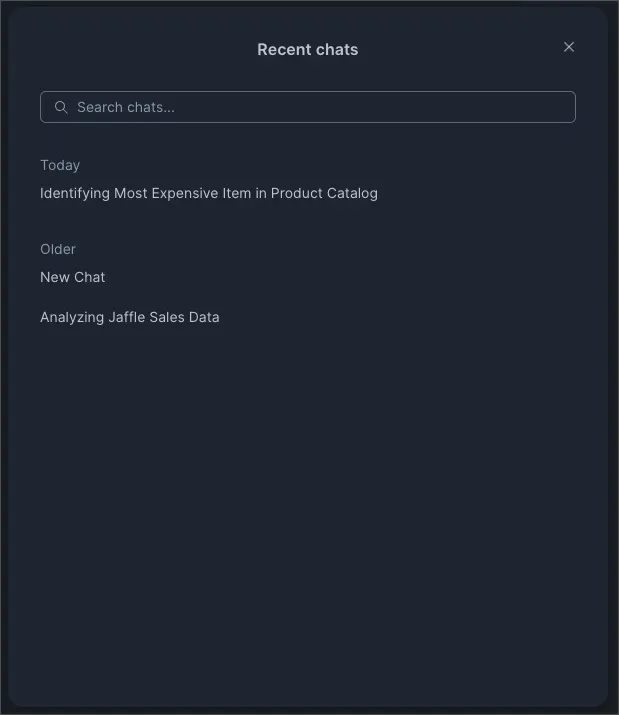
Phase 5: Using Intelligence
Users access Intelligence at ai.snowflake.com. Here, you’ll find a very simple sidebar navigation with three options:

New Chat:
Agents:
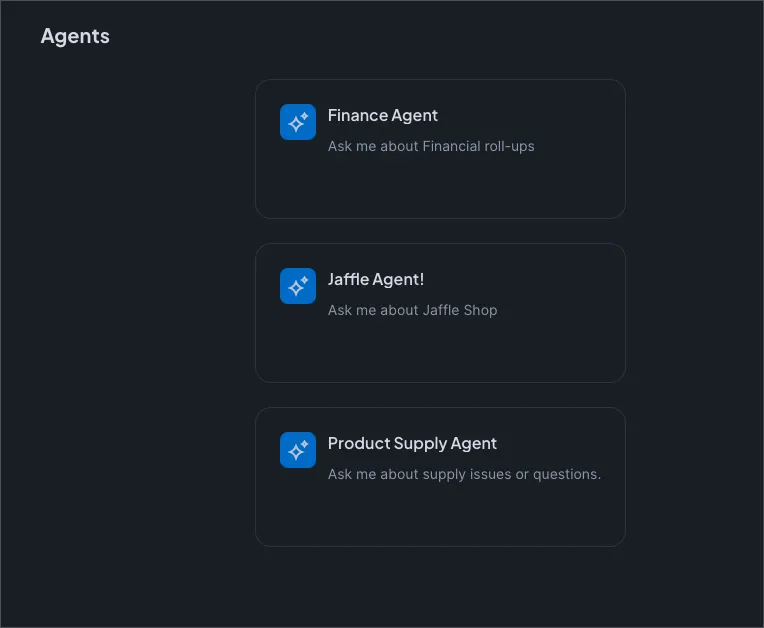
Recent (chats)
Most users will start with “New chat”. Just pick an agent, a data source (auto is suggested), and ask a question.
When you ask a question, you’ll see the agent goes into deep thinking mode, and shows its reasoning steps along the way:
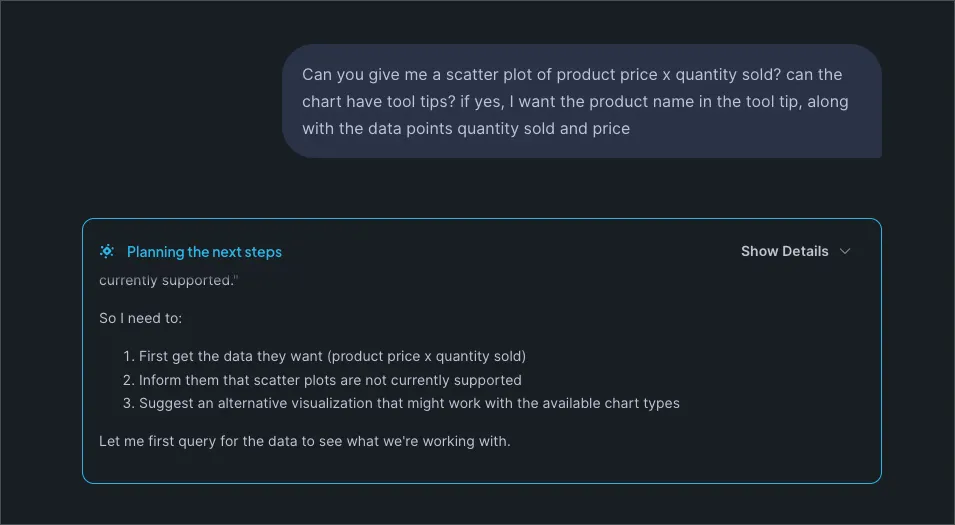
Once the agent has finalized the answer, it will hide the reasoning details by default, but you can always check back on the thought process by clicking “show details”.
Snowflake Intelligence Shortfalls
One of the main downsides I see is that you can’t save analyses to visit often. There’s no “chat once review report many times” functionality. Other AI driven agents will allow you to pin analysis to a dashboard or folder, and refresh a specific analysis. With this Snowflake Intelligence, if you have the same question every day, you need to go back to the chat and ask it to refresh the analysis with the latest data. This is a sub-optimal user experience for recurring reports.
How does Snowflake Intelligence pricing work?
Cortex Agents and therefore Snowflake Intelligence doesn't have any cost considerations besides those associated with the underlying Cortex Search and Cortex Analyst functionality. We’ve written detailed articles on these topics, linked below. But here’s a quick summary of each of the cost components.
Cortex Analyst costs:
Cortex Analyst handles questions that require querying structured and semi-structured data; this covers AI costs for text-to-SQL. Additional warehouse costs apply when you execute the SQL generated by Cortex Analyst. The AI Services component charges per request, not per token. According to the Snowflake Service Consumption Table, Cortex Analyst consumes 6.7 credits per 100 request for most models.
Cortex Search costs (for unstructured data):
Cortex Search handles user chats that query unstructured data. Search services consume credits during both indexing and searching. This is currently 8 credits per hour.
How to monitor Snowflake Intelligence costs & usage
Our article on Cortex Search and Cortex Analyst go into more detail on monitoring each of those services. Intelligence costs show up across multiple service types, so you need comprehensive queries to track everything. Check out the last monitoring query that monitors all services that may be used by Snowflake Intelligence!
Track Cortex Analyst usage
This shows who's using Cortex Analyst the most and which warehouses are executing the generated queries.
Track all AI Services costs
This captures all AI-related costs including Cortex Search, Document AI, and AISQL functions in one place.
Monitor warehouse costs for Intelligence queries
Unfortunately, there is no great way to find queries generated by an agent. You can filter by Warehouse or Role, but there is no specific logging that flags these query IDs separately. Here’s an example of filtering by Warehouse. Please consider how you are going to identify these queries and set up your environment accordingly.
Track Cortex Search operations
Combined Intelligence cost view
This query gives you a complete picture of Intelligence costs broken down by component, letting you see whether costs are driven by query volume, search operations, or warehouse compute.
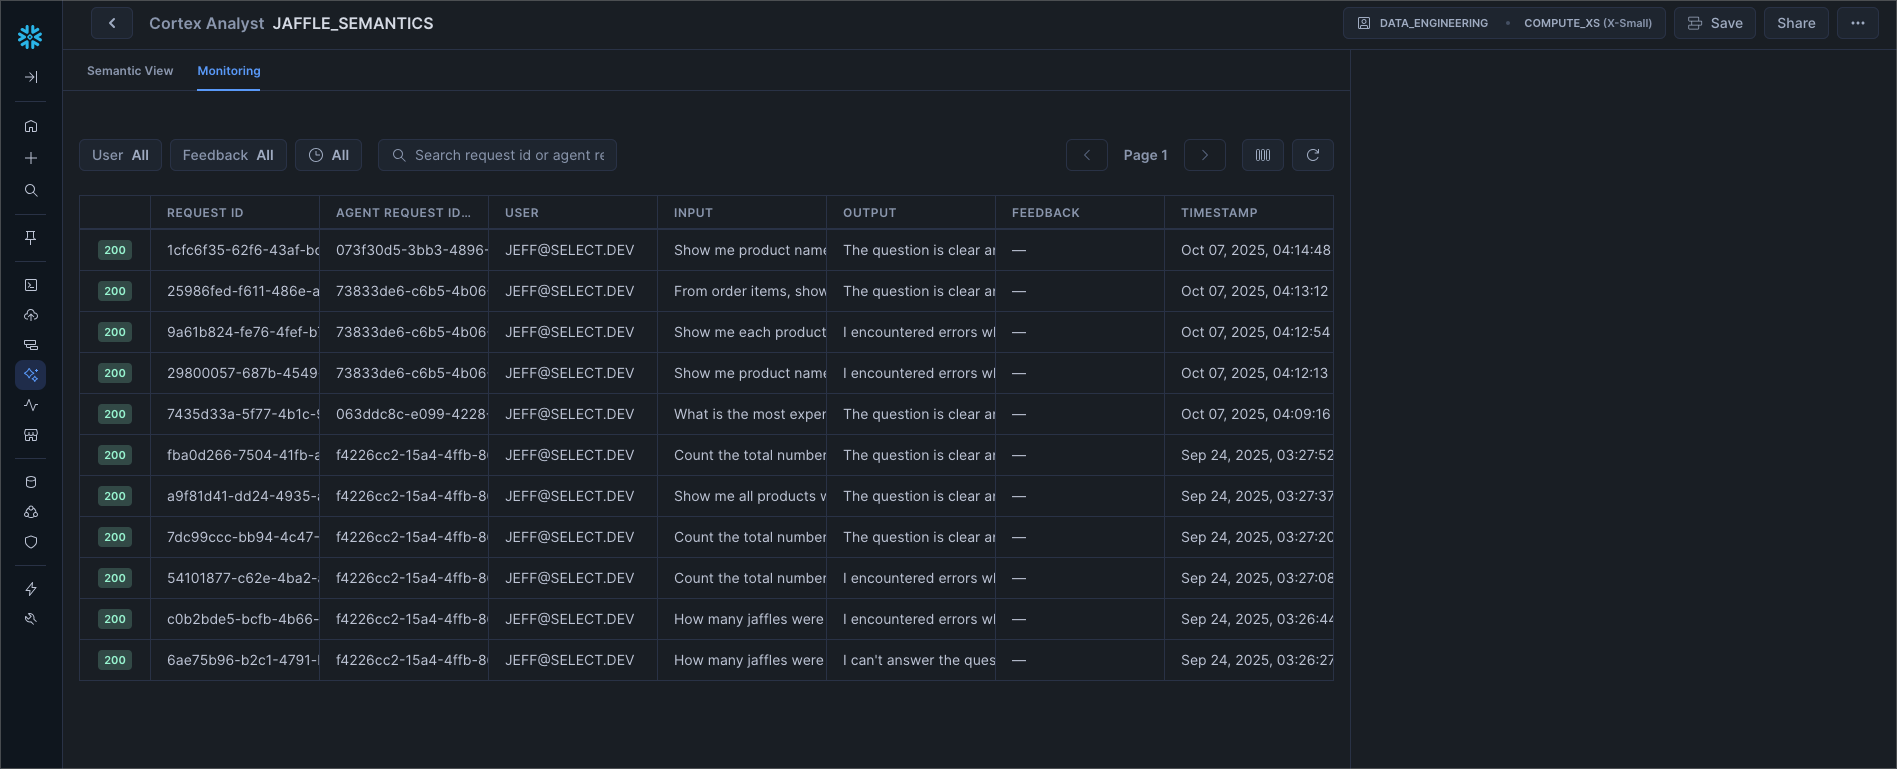
Monitor specific Semantic Views in Snowsight
In the Snowsight UI, go to AI ML -> Cortex Analyst -> Semantic Views -> Monitoring. Here you will find the usage on specific semantic views.
Best practices & recommendations when using Snowflake Intelligence
Set up alerts, not just dashboards
Those monitoring queries above are worthless if nobody runs them. For anything you want to monitor in Snowflake, you can wrap the SQL in a scheduled task with a Notification Integration to create a custom monitor that sends alerts to Slack or Teams. If you want extremely easy to use monitoring functionality, check out monitors in SELECT.
Right-size your warehouses for Intelligence workloads
The above charges cover AI costs for text-to-SQL. Additional warehouse costs apply when you execute the SQL generated by Cortex Analyst. Start with an X-Small or Small warehouse for Analyst queries. The SQL generation itself is cheap; the query execution can be expensive if you're using oversized warehouses.
Design semantic views strategically
Poor semantic view design makes agents slow and expensive. Follow these principles:
Start narrow, expand gradually. Begin with 3-5 key tables and the most common questions. A well-scoped semantic file ensures higher precision and accuracy of results. You can always add more tables later.
Add verified query repositories. These are example questions with validated SQL that dramatically improve accuracy. When users ask similar questions, Cortex Analyst can reference these examples:
Use descriptive names and add synonyms. If your table is called dim_product_category_master, define it with business-friendly names:
Implement usage quotas per user or role
Snowflake Intelligence doesn't have built-in per-user quotas, but you can implement them through resource monitors on the warehouses used by agents:
Optimize your Cortex Search services
Search costs depend heavily on how you configure the service. Follow these guidelines:
Set appropriate target lags. If your documents don't change frequently, use longer refresh intervals:
Filter search scope when possible. If agents only need recent documents, add filters:
Wrap Up
Snowflake Intelligence makes enterprise data accessible to non-technical users through natural language, combining structured and unstructured data sources seamlessly. The key to controlling costs is understanding the components: Cortex Analyst for SQL generation, virtual warehouses for query execution, Cortex Search for unstructured data, and LLM orchestration to tie it all together.
Start small with a focused semantic view covering your most critical metrics, monitor usage closely, and expand gradually as you understand your cost drivers. Most importantly, set up alerts on those monitoring queries so you catch cost spikes before they hit your bill.
Let us know how you're using Snowflake Intelligence! We'd love to hear real-world stories about which use cases justify the cost and where you've seen the biggest ROI.

Jeff is a Data and Analytics Consultant with 15+ years experience in automating insights and using data to control business processes. From a technology standpoint, he specializes in Snowflake + dbt + Tableau. From a business topic standpoint, he has experience in Public Utility, Clinical Trials, Publishing, CPG, and Manufacturing. Reach out any time, [email protected].
Want to hear about our latest data cloud learnings?Subscribe to get notified.
Get up and running in less than 15 minutes
Connect your Snowflake, Databricks, or BigQuery account and instantly understand your savings potential.

